
Get early access
In this guide, you will learn how to build a frontend for your Microsoft Agent Framework Agents using AG-UI Protocol and CopilotKit. Microsoft Agent Framework will power the AI agents backend while CopilotKit powers the frontend and then AG-UI creates a bridge that enables the frontend to communicate with the backend.
By the way, checkout out the AG-UI + Microsoft announcement blog on CopilotKit's website!
Before we jump in, here is what we will cover:
Here is a preview of what you can build using Microsoft Agent Framework + AG-UI + CopilotKit.
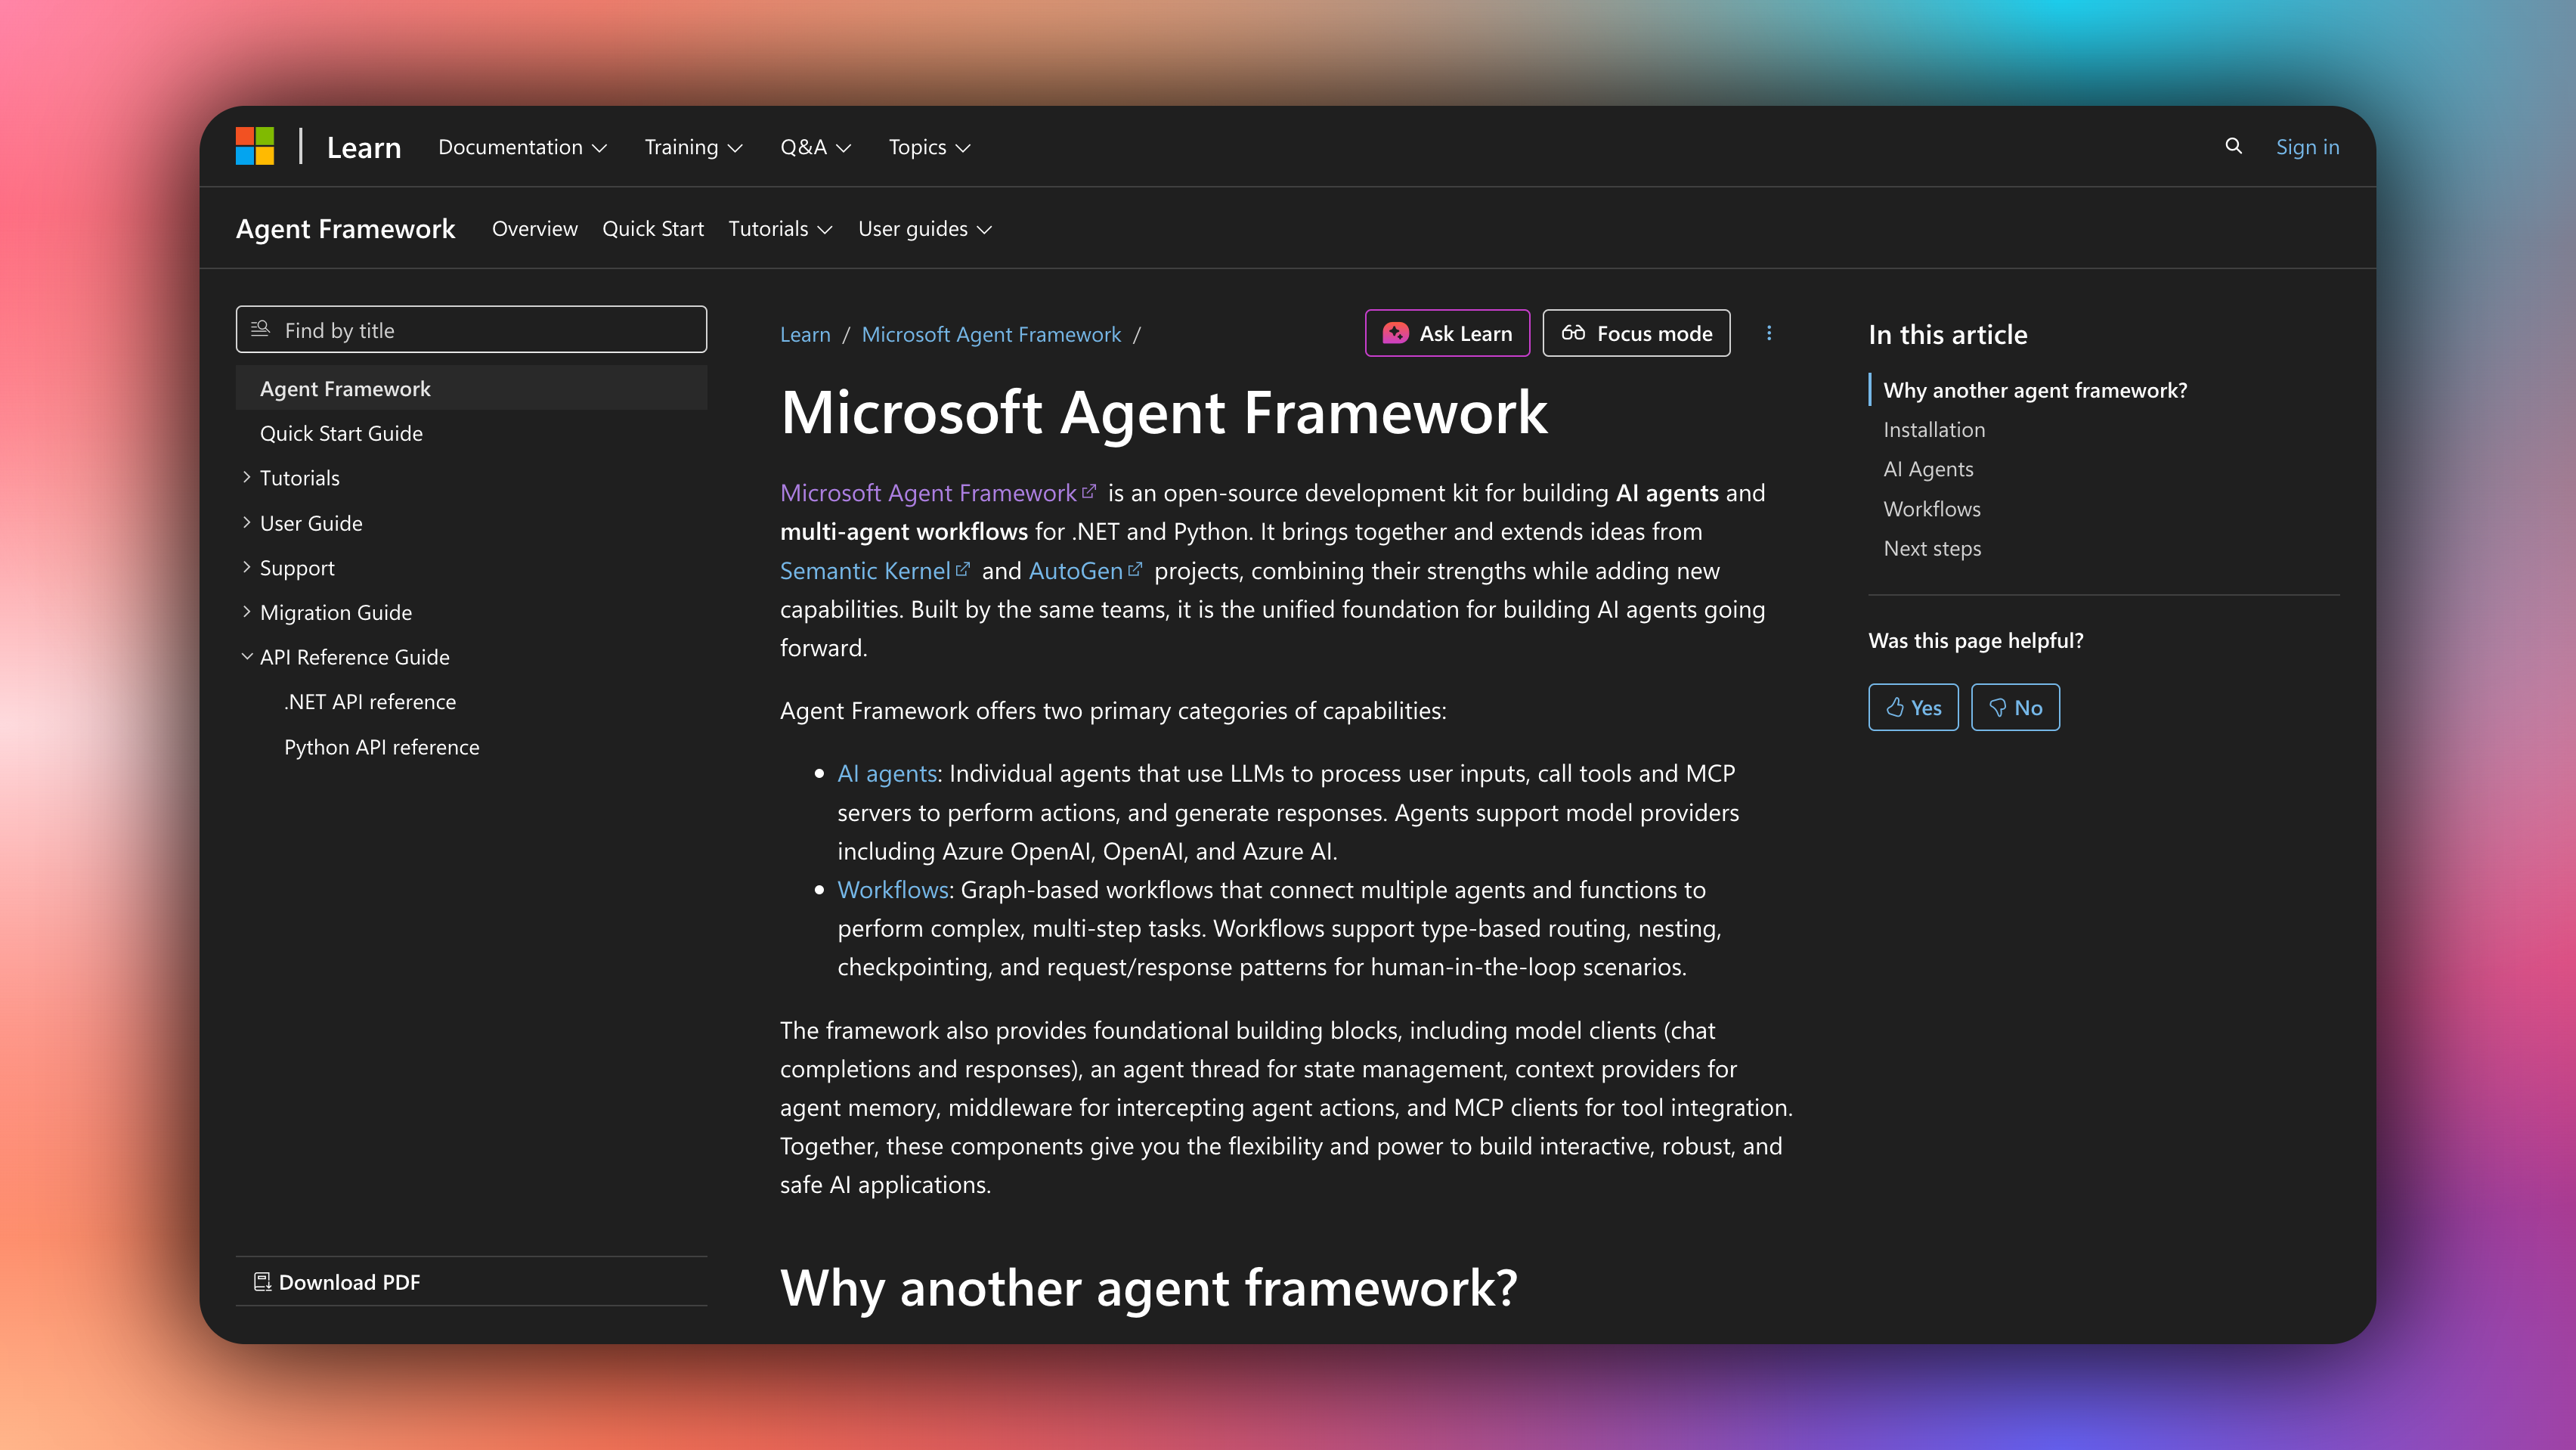
The Microsoft Agent Framework is an open-source software development kit (SDK) and runtime designed for building, orchestrating, and deploying AI agents and multi-agent workflows.
It supports both Python and .NET languages, allowing developers to create everything from simple chat-based agents to complex systems where multiple agents collaborate on tasks
Microsoft Agent Framework key features include:
If you want to dive deeper into how Microsoft Agent Framework works and its setup, check out the docs here: Microsoft Agent Framework docs.
Before you begin, you'll need the following:
In this section, you will learn how to set up a full-stack Microsoft Agent Framework agent using a CLI command that setups the backend using AG-UI protocol and the frontend using CopilotKit.
Let’s get started.
If you don’t already have a Microsoft Agent Framework agent, you can set up one quickly by running the CLI command below in your terminal.
npx copilotkit@latest init -m microsoft-agent-frameworkThen give your project a name as shown below.
Once your project has been created successfully, install dependencies using your preferred package manager:
# Using pnpm (recommended)
pnpm install

# Using npm
npm install

# Using yarn
yarn install

# Using bun
bun installAfter installing the dependencies, first, get your GitHub token:
gh auth tokenThen, navigate to the agent directory and set it as a user secret:
cd agent
dotnet user-secrets set GitHubToken="<your-token>"
cd ..Then start the development server using your preferred package manager:
# Using pnpm
pnpm dev
# Using npm
npm run dev
# Using yarn
yarn dev
# Using bun
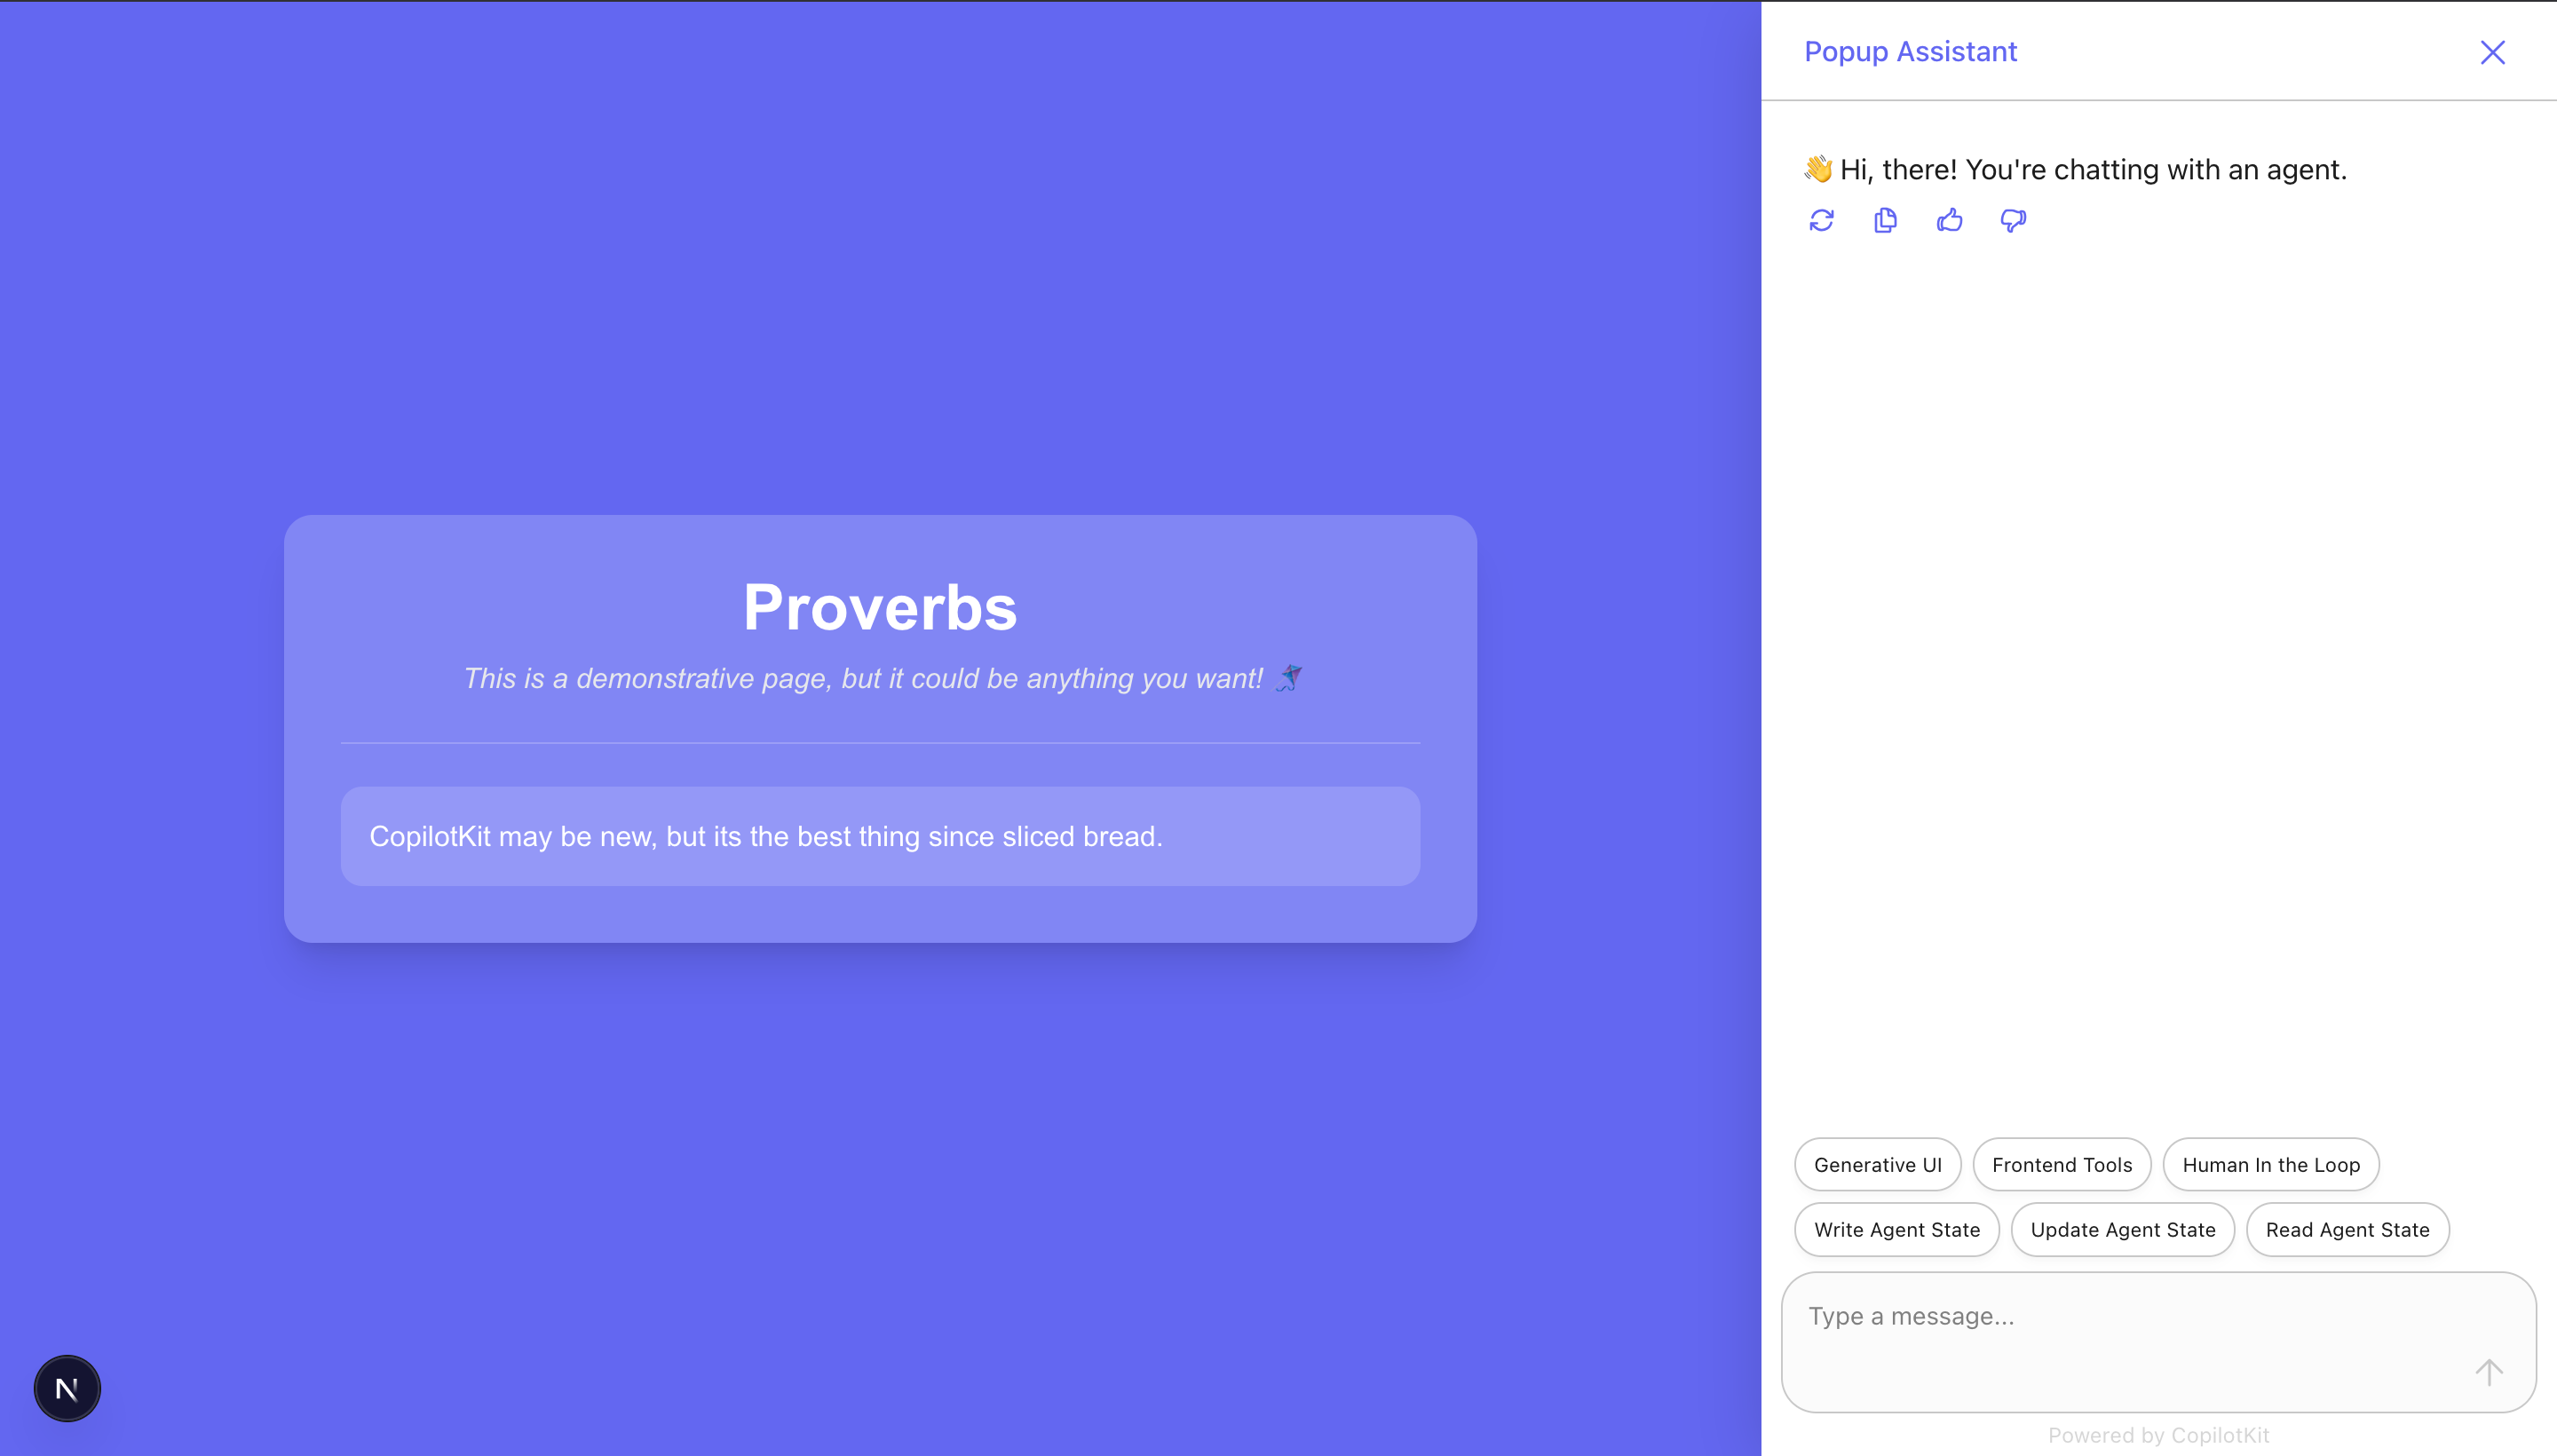
bun run devOnce the development server is running, navigate to http://localhost:3000/ and you should see your Microsoft Agent Framework + AG-UI + CopilotKit agent up and running.
Congrats! You've successfully integrated a ADK Agent chatbot to your application. To start, try the provided tools to set the web page theme, write proverbs or get the weather, as shown below.
In this section, you will learn how to integrate your Microsoft Agent Framework agent with AG-UI protocol, in order to expose it to the frontend.
Let’s jump in.
To get started, install the Microsoft Agent Framework + AG-UI packages together with other necessary dependencies using the commands below.
dotnet new web -n AGUIServer
cd AGUIServer
dotnet add package Microsoft.Agents.AI.Hosting.AGUI.AspNetCore
dotnet add package Microsoft.Extensions.AI.OpenAI
dotnet add package OpenAIOnce you have installed the required packages, import them as shown below in a Program.cs file.
using Microsoft.Agents.AI;
using Microsoft.Agents.AI.Hosting.AGUI.AspNetCore;
using Microsoft.AspNetCore.Http.Json;
using Microsoft.Extensions.AI;
using Microsoft.Extensions.Options;
using OpenAI;
using System.ComponentModel;
using System.Text.Json.Serialization;After importing the required packages, create a new WebApplicationBuilder instance with command-line arguments, configure JSON Serialization Options and register AG-UI Services, as shown below.
// ...

// Create a new WebApplicationBuilder instance with command-line arguments
WebApplicationBuilder builder = WebApplication.CreateBuilder(args);

// Configure JSON Serialization Options
builder.Services.ConfigureHttpJsonOptions(options => options.SerializerOptions.TypeInfoResolverChain.Add(ProverbsAgentSerializerContext.Default));

// Register AG-UI Services
builder.Services.AddAGUI();

// Build the WebApplication instance from the builder
// This compiles all registered services and configurations
WebApplication app = builder.Build();

// ...Once you have configured web application builder, set up agent factory and map endpoints, as shown below.
// ...

// Get Required Services from Dependency Injection Container
// Retrieve the logger factory for creating loggers
var loggerFactory = app.Services.GetRequiredService<ILoggerFactory>();
// Retrieve JSON options for serialization configuration
var jsonOptions = app.Services.GetRequiredService<IOptions<JsonOptions>>();

// Create Agent Factory Instance
// Instantiate the ProverbsAgentFactory with:
// - Application configuration (for accessing appsettings, environment variables, etc.)
// - Logger factory (for creating loggers within the factory)
// - JSON serializer options (for serializing agent data)
var agentFactory = new ProverbsAgentFactory(builder.Configuration, loggerFactory, jsonOptions.Value.SerializerOptions);

// Map AG-UI Endpoint
// Map the root path ("/") to the AG-UI agent endpoint
// The CreateProverbsAgent() method returns a configured AI agent instance
// This allows the agent to handle requests at the root URL
app.MapAGUI("/", agentFactory.CreateProverbsAgent());

// Start the web application and begin listening for HTTP requests
// This is an async operation that will run until the application is stopped
await app.RunAsync();

// ...After setting up the agent factory and mapping endpoints, define your agent state class that maintains the application's state. The agent state class is registered as a singleton in the dependency injection container, meaning there's one instance shared across the entire application lifetime.
// ...

public class ProverbsState
{
    // Initialize the Proverbs list as an empty list to avoid null reference issues
    public List<string> Proverbs { get; set; } = new List<string>();
}

// ...Once you have defined your agent state, configure your agent factory class responsible for creating and configuring AI agents.
// ...

public class ProverbsAgentFactory
{
    // Store configuration for accessing settings (like API tokens)
    private readonly IConfiguration _configuration;
    // Reference to the shared state instance
    private readonly ProverbsState _state;
    // OpenAI client instance for making API calls
    private readonly OpenAIClient _openAiClient;
    // Logger instance for logging agent activities
    private readonly ILogger _logger;
    // JSON serializer options for serializing/deserializing agent data
    private readonly System.Text.Json.JsonSerializerOptions _jsonSerializerOptions;

    // ...
 }

// ...Inside the agent factory class, define a constructor that initializes the agent factory by using GitHub token to authenticate with the Azure OpenAI endpoint and configure the OpenAI client.
// ...

public class ProverbsAgentFactory
{
    // Store configuration for accessing settings (like API tokens)
    private readonly IConfiguration _configuration;
    // Reference to the shared state instance
    private readonly ProverbsState _state;
    // OpenAI client instance for making API calls
    private readonly OpenAIClient _openAiClient;
    // Logger instance for logging agent activities
    private readonly ILogger _logger;
    // JSON serializer options for serializing/deserializing agent data
    private readonly System.Text.Json.JsonSerializerOptions _jsonSerializerOptions;

    // Step 3.1: Constructor - Initialize the factory with dependencies
    // This constructor is called by the dependency injection container
    public ProverbsAgentFactory(IConfiguration configuration, ProverbsState state)
    {
        // Store injected dependencies
        _configuration = configuration;
        _state = new();

        // Step 3.2: Retrieve the GitHub token from configuration
        // The token is used to authenticate with the Azure OpenAI endpoint
        // If the token is not found, throw an exception with helpful instructions
        var githubToken = _configuration["GitHubToken"]
            ?? throw new InvalidOperationException(
                "GitHubToken not found in configuration. " +
                "Please set it using: dotnet user-secrets set GitHubToken "<your-token>" " +
                "or get it using: gh auth token");

        // Step 3.3: Create and configure the OpenAI client
        // - Use the GitHub token as the API key credential
        // - Set the endpoint to Azure's inference API endpoint
        _openAiClient = new OpenAIClient(
            new System.ClientModel.ApiKeyCredential(githubToken),
            new OpenAIClientOptions
            {
                Endpoint = new Uri("https://models.inference.ai.azure.com")
            });
    }

    // ...

}Once you have initialized the agent factory, define a method inside the agent factory class that sets up the chat client, defines the agent's behavior, and registers the available tools
// ...

public class ProverbsAgentFactory
{
    // Store configuration for accessing settings (like API tokens)
    private readonly IConfiguration _configuration;
    // Reference to the shared state instance
    private readonly ProverbsState _state;
    // OpenAI client instance for making API calls
    private readonly OpenAIClient _openAiClient;
    // Logger instance for logging agent activities
    private readonly ILogger _logger;
    // JSON serializer options for serializing/deserializing agent data
    private readonly System.Text.Json.JsonSerializerOptions _jsonSerializerOptions;

    // ...

    // Create Proverbs Agent
    // This method creates and configures the AI agent with its tools and capabilities
    public AIAgent CreateProverbsAgent()
    {
        // Get Chat Client
        // Retrieve a chat client for the "gpt-4o-mini" model
        // Convert it to the IChatClient interface required by the agent framework
        var chatClient = _openAiClient.GetChatClient("gpt-4o-mini").AsIChatClient();

        // Create Chat Client Agent
        // Create a ChatClientAgent that wraps the chat client with agent capabilities
        // - name: Identifier for the agent
        // - description: System prompt that describes the agent's role and behavior
        //   This instructs the agent to always check the current proverbs list before discussing them
        // - tools: Array of functions the agent can call to perform actions
        var chatClientAgent = new ChatClientAgent(
            chatClient,
            name: "ProverbsAgent",
            description: @"A helpful assistant that helps manage and discuss proverbs.
            You have tools available to add, set, or retrieve proverbs from the list.
            When discussing proverbs, ALWAYS use the get_proverbs tool to see the current list before mentioning, updating, or discussing proverbs with the user.",
            tools: [
                // Tool 1: Get current list of proverbs
                AIFunctionFactory.Create(GetProverbs, options: new() { Name = "get_proverbs", SerializerOptions = _jsonSerializerOptions }),
                // Tool 2: Add new proverbs to the existing list
                AIFunctionFactory.Create(AddProverbs, options: new() { Name = "add_proverbs", SerializerOptions = _jsonSerializerOptions }),
                // Tool 3: Replace the entire list of proverbs
                AIFunctionFactory.Create(SetProverbs, options: new() { Name = "set_proverbs", SerializerOptions = _jsonSerializerOptions }),
                // Tool 4: Get weather information for a location
                AIFunctionFactory.Create(GetWeather, options: new() { Name = "get_weather", SerializerOptions = _jsonSerializerOptions })
            ]);

        // Wrap with Shared State Agent
        // Wrap the chat client agent with SharedStateAgent to enable state persistence
        // This allows the agent to maintain state across multiple interactions
        // The JSON serializer options are used for state serialization
        return new SharedStateAgent(chatClientAgent, _jsonSerializerOptions);
    }
    // ...

}After configuring your agent, define agent tool methods inside the agent factory class that the your AI agent can call as tools.
// ...

public class ProverbsAgentFactory
{
    // Store configuration for accessing settings (like API tokens)
    private readonly IConfiguration _configuration;
    // Reference to the shared state instance
    private readonly ProverbsState _state;
    // OpenAI client instance for making API calls
    private readonly OpenAIClient _openAiClient;
    private readonly ILogger _logger;

    // Tool 1: Get Proverbs
    // Retrieves the current list of proverbs from the shared state
    [Description("Get the current list of proverbs.")]
    private List<string> GetProverbs()
    {
        _logger.LogInformation("📖 Getting proverbs: {Proverbs}", string.Join(", ", _state.Proverbs));
        return _state.Proverbs;
    }

    // Tool 2: Add Proverbs
    [Description("Add new proverbs to the list.")]
    private void AddProverbs([Description("The proverbs to add")] List<string> proverbs)
    {
        _logger.LogInformation("➕ Adding proverbs: {Proverbs}", string.Join(", ", proverbs));
        _state.Proverbs.AddRange(proverbs);
    }

    // Tool 3: Set Proverbs
    [Description("Replace the entire list of proverbs.")]
    private void SetProverbs([Description("The new list of proverbs")] List<string> proverbs)
    {
        _logger.LogInformation("📝 Setting proverbs: {Proverbs}", string.Join(", ", proverbs));
        _state.Proverbs = proverbs.ToList(); // corrected from [.. proverbs]
    }

    // Tool 4: Get Weather
    [Description("Get the weather for a given location. Ensure location is fully spelled out.")]
    private WeatherInfo GetWeather([Description("The location to get the weather for")] string location)
    {
        _logger.LogInformation("🌤️  Getting weather for: {Location}", location);
        return new WeatherInfo
        {
            Temperature = 20,
            Conditions = "sunny",
            Humidity = 50,
            WindSpeed = 10,
            FeelsLike = 25
        };
    }
}

// ...Once your agent factory class is configured, configure data model classes that define the structure of data returned by tools.
// ...

// Step 5.1: Model for returning proverbs state snapshots
// Used by tools that modify proverbs to return the updated state
public class ProverbsStateSnapshot
{
    // Map the C# property name "Proverbs" to JSON property name "proverbs"
    // This follows JSON naming conventions (camelCase)
    [JsonPropertyName("proverbs")]
    public List<string> Proverbs { get; set; } = new();
}

// Step 5.2: Model for weather information
// Used by the GetWeather tool to return structured weather data
public class WeatherInfo
{
    // Temperature in degrees (example uses Celsius)
    [JsonPropertyName("temperature")]
    public int Temperature { get; init; }

    // Weather conditions description (e.g., "sunny", "cloudy", "rainy")
    [JsonPropertyName("conditions")]
    public string Conditions { get; init; } = string.Empty;

    // Humidity percentage (0-100)
    [JsonPropertyName("humidity")]
    public int Humidity { get; init; }

    // Wind speed (units depend on implementation)
    [JsonPropertyName("wind_speed")]
    public int WindSpeed { get; init; }

    // "Feels like" temperature (accounts for wind, humidity, etc.)
    [JsonPropertyName("feelsLike")]
    public int FeelsLike { get; init; }
}

// Step 5.3: Partial class declaration
// This allows the Program class to be extended with the top-level statements below
// (C# 9+ top-level statements are compiled into a Program class)
public partial class Program { }

// ...After defining data model classes, configure serializer context, as shown below.
// ...

// Register ProverbsStateSnapshot for JSON serialization
[JsonSerializable(typeof(ProverbsStateSnapshot))]
// Register WeatherInfo for JSON serialization
[JsonSerializable(typeof(WeatherInfo))]
// Sealed partial class that provides type information for JSON serialization
// The JsonSerializerContext base class enables source generation
internal sealed partial class ProverbsAgentSerializerContext : JsonSerializerContext;
Then use the command below to run your agent.
dotnet runCongrats! You've successfully integrated your Microsoft Agent Framework Agent with AG-UI protocol and it is available at http://localhost:8000 (or specified port) endpoint.
Let’s now see how to add frontend to your AG-UI wrapped Microsoft Agent Framework agent.
In this section, you will learn how to add a frontend to your Microsoft Agent Framework + AG-UI agent using CopilotKit which runs anywhere that React runs.
Let’s get started.
To get started, install the latest packages for CopilotKit into your frontend.
npm install @copilotkit/react-ui @copilotkit/react-core @copilotkit/runtimeOnce you have installed CopilotKit packages, setup the copilot runtime instance with an HttpAgent instance in the /api/copilotkit API route that enables your frontend to make HTTP requests to the backend.
import {
  CopilotRuntime, // Main runtime that manages agent communication
  ExperimentalEmptyAdapter, // Service adapter for single-agent setups
  copilotRuntimeNextJSAppRouterEndpoint, // Next.js App Router endpoint handler
} from "@copilotkit/runtime";

// Import AG-UI client for connecting to Microsoft Agent Framework agents
import { HttpAgent } from "@ag-ui/client";

// Import Next.js types for request handling
import { NextRequest } from "next/server";

// Create a service adapter for the CopilotKit runtime
const serviceAdapter = new ExperimentalEmptyAdapter();

// Create the main CopilotRuntime instance that manages communication between the frontend and backend agents
const runtime = new CopilotRuntime({

  // Define the agents that will be available to the frontend
    agents: {

    // Configure the ADK agent connection
    my_agent: new HttpAgent({

      // Specify the URL where the Microsoft Agent Framework agent is running
      url: "http://localhost:8000/",
    }),
  },
});

// Export the POST handler for the API route
export const POST = async (req: NextRequest) => {

  // Create the request handler using CopilotKit's Next.js helper
  const { handleRequest } = copilotRuntimeNextJSAppRouterEndpoint({
    runtime, // The CopilotRuntime instance we configured
    serviceAdapter, // The service adapter for agent coordination
    endpoint: "/api/copilotkit", // The endpoint path (matches this file's location)
  });


  return handleRequest(req);
};After setting up a Copilot Runtime instance, set up CopilotKit provider component that manages your ADK agent sessions.
To set up the CopilotKit Provider, the <CopilotKit> component must wrap the Copilot-aware parts of your application.
For most use cases, it's appropriate to wrap the CopilotKit provider around the entire app, e.g., in your layout.tsx file.
// Step 1: Import necessary types and components from Next.js and CopilotKit
import type { Metadata } from "next";

import { CopilotKit } from "@copilotkit/react-core";
import "./globals.css";
import "@copilotkit/react-ui/styles.css";

// Step 2: Define metadata for the application, used by Next.js for SEO and page headers
export const metadata: Metadata = {
  title: "Create Next App",
  description: "Generated by create next app",
};

// Step 3: Define the RootLayout component, which wraps the entire application
export default function RootLayout({
  children,
}: Readonly{ children: React.ReactNode }) {
  // Step 4: Return the JSX structure for the layout
  return (
    <html lang="en">
      <body className="antialiased">
        <CopilotKit runtimeUrl="/api/copilotkit" agent="my_agent">
          {children}
        </CopilotKit>
      </body>
    </html>
  );
}Once you have set up the CopilotKit Provider, set up a Copilot UI component that enables you to interact with your ADK agent. CopilotKit ships with a number of built-in chat components which include CopilotPopup, CopilotSidebar, and CopilotChat.
To set up a Copilot UI component, define it alongside your core page components, e.g. in your page.tsx file.
"use client";

import { CopilotKitCSSProperties, CopilotSidebar } from "@copilotkit/react-ui";
import { useState } from "react";

export default function CopilotKitPage() {
  const [themeColor, setThemeColor] = useState("#6366f1");

  // ...

  return (
    <main style={{ "--copilot-kit-primary-color": themeColor } as CopilotKitCSSProperties}>
      <CopilotSidebar
        disableSystemMessage={true}
        clickOutsideToClose={false}
        labels={{
          title: "Popup Assistant",
          initial: "👋 Hi, there! You're chatting with an agent.",
        }}
        suggestions={[
          { title: "Generative UI", message: "Get the weather in San Francisco." },
          { title: "Frontend Tools", message: "Set the theme to green." },
          { title: "Human In the Loop", message: "Please go to the moon." },
          { title: "Write Agent State", message: "Add a proverb about AI." },
          { title: "Update Agent State", message: "Please remove 1 random proverb from the list if there are any." },
          { title: "Read Agent State", message: "What are the proverbs?" },
        ]}
      >
        <YourMainContent themeColor={themeColor} />
      </CopilotSidebar>
    </main>
  );
}After setting up a Copilot UI component, sync your Microsoft Agent Framework agent state with the frontend using CopilotKit hooks.
To sync your Microsoft Agent Framework agent state with the frontend, use the CopilotKit useCoAgent hook that allows you to share state bidirectionally between your application and the agent.
"use client";
import { useCoAgent } from "@copilotkit/react-core";
// State of the agent, make sure this aligns with your agent's state.
type AgentState = {
proverbs: string[];
}
function YourMainContent({ themeColor }: { themeColor: string }) {
// 🪁 Shared State: https://docs.copilotkit.ai/coagents/shared-state
const { state, setState } = useCoAgent<AgentState>({
name: "my_agent",
initialState: {
proverbs: [
"CopilotKit may be new, but its the best thing since sliced bread.",
],
},
})
// ...
return (
// ...
)
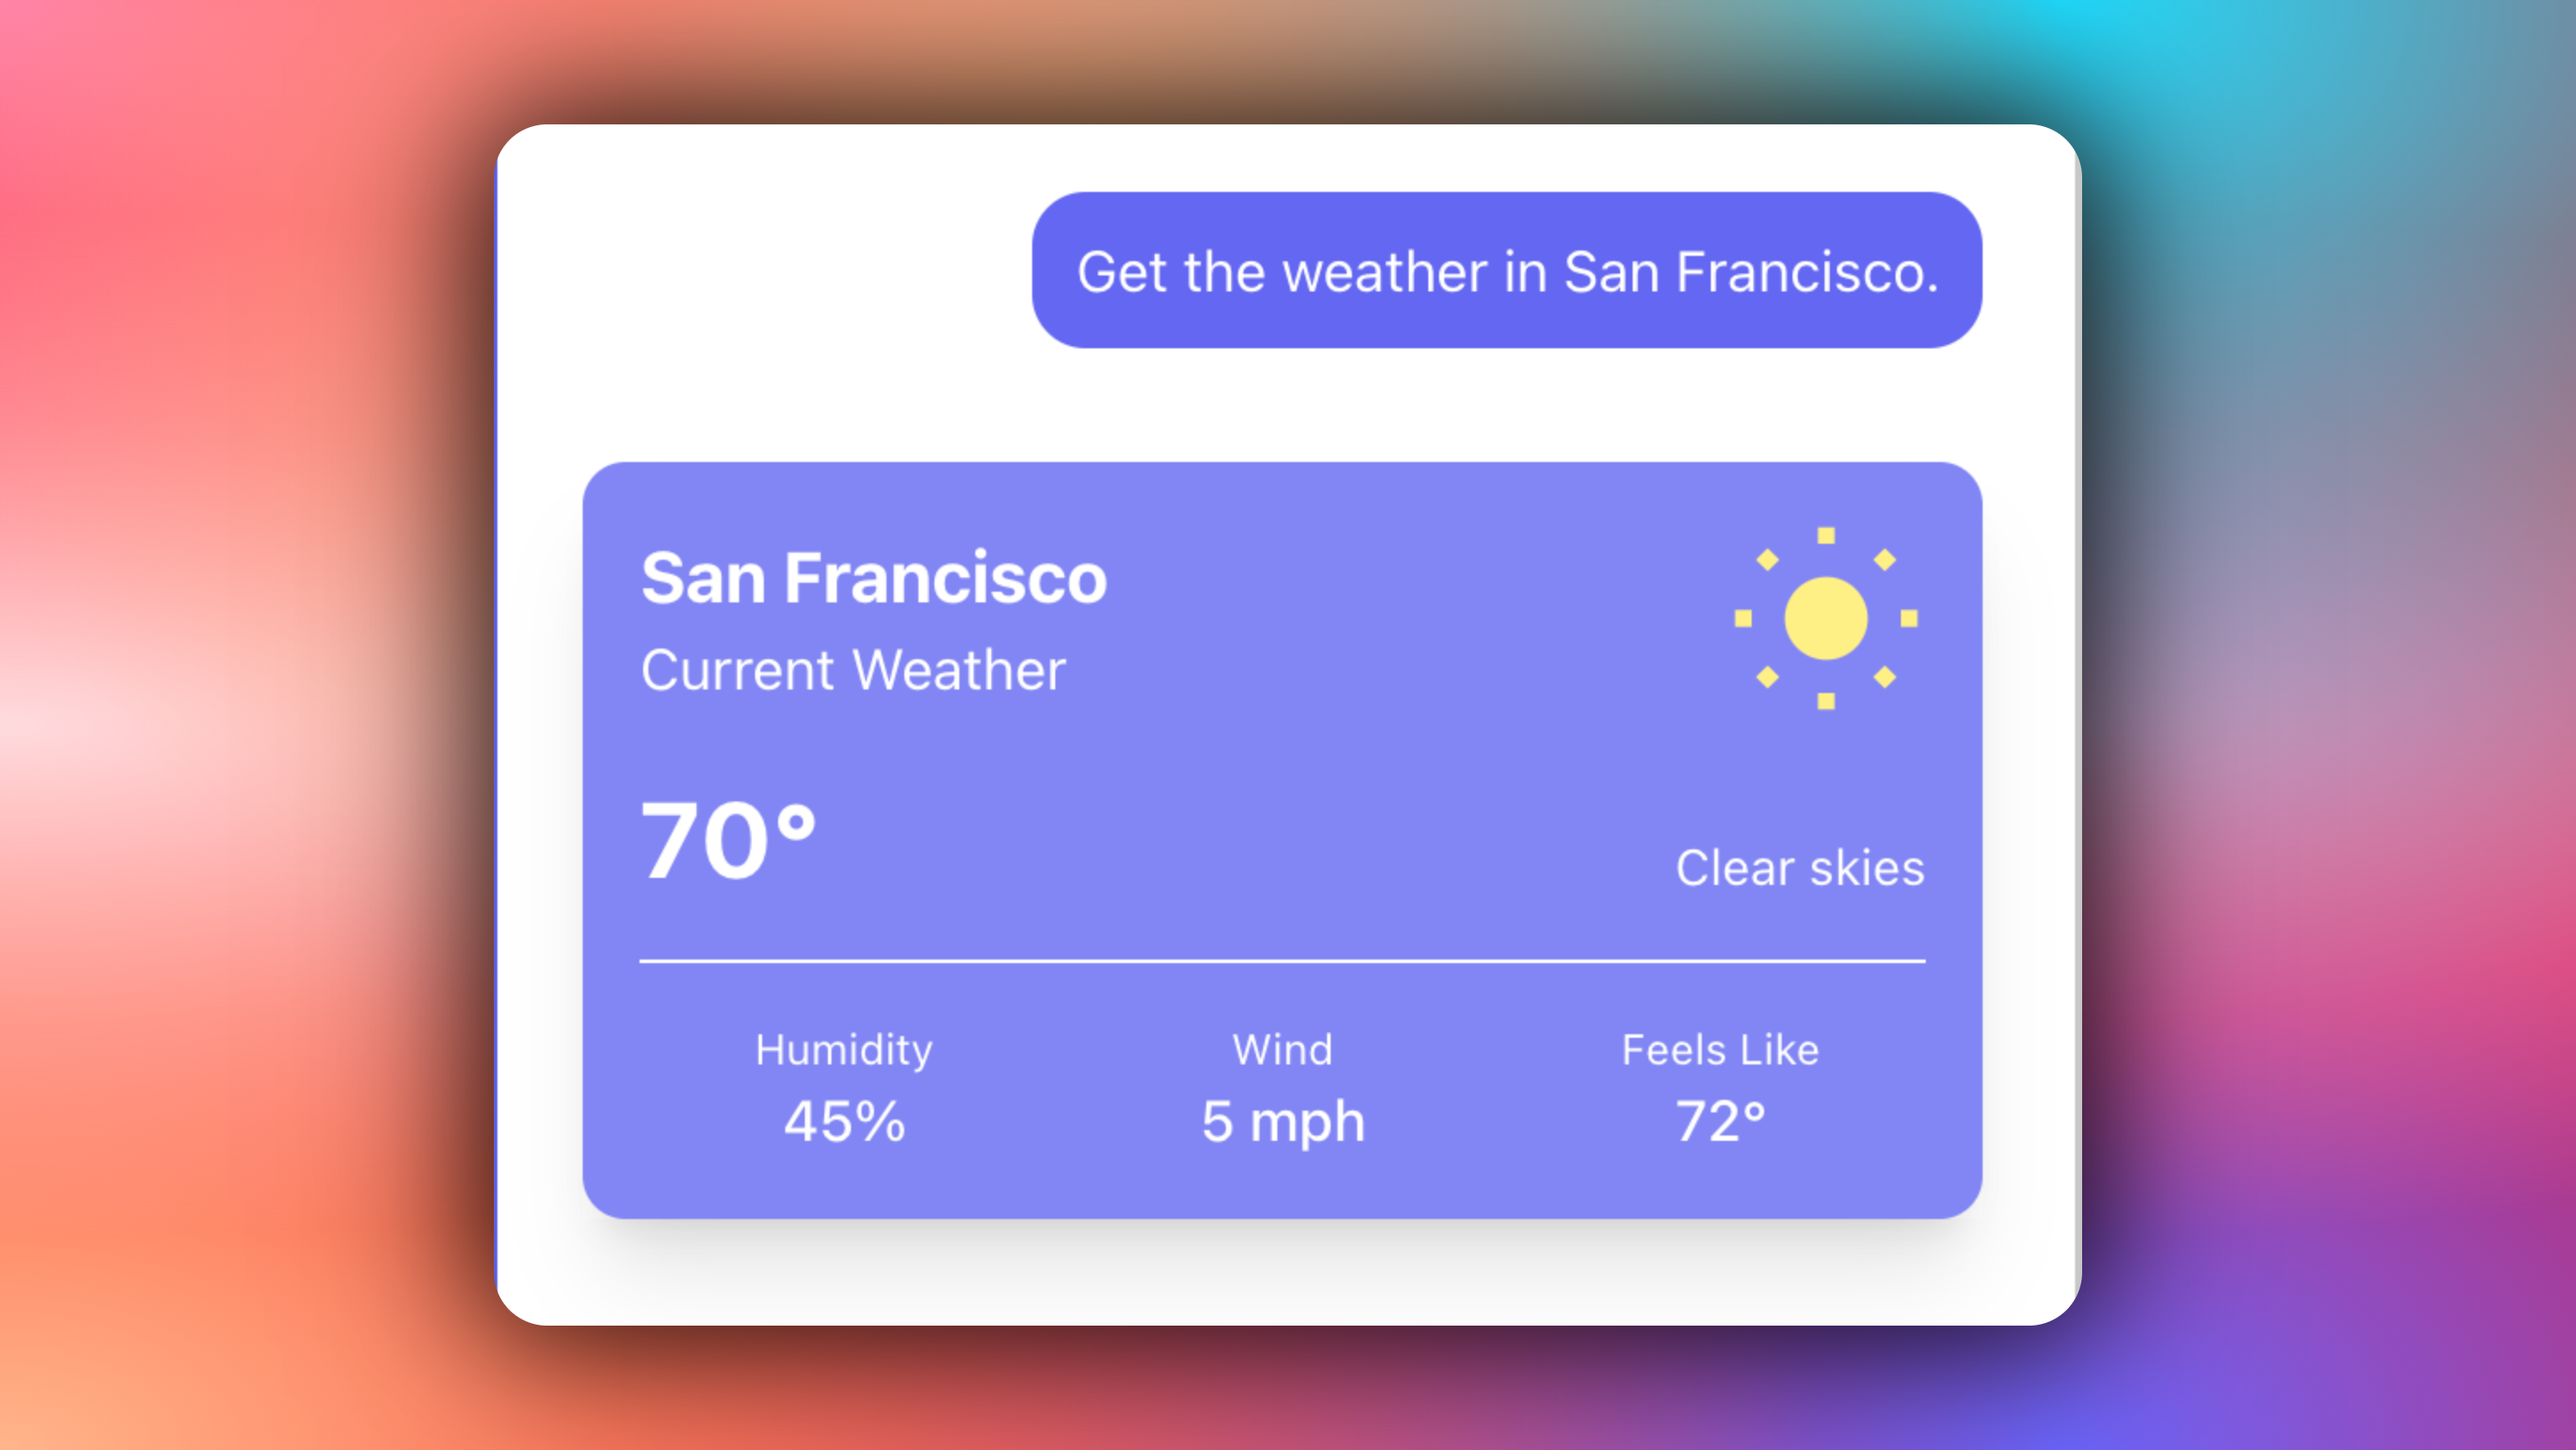
}To render your agent's state, progress, outputs, or tool calls with custom UI components in real-time, you can use tool-based Generative UI.
"use client";

import { useCoAgent, useCopilotAction } from "@copilotkit/react-core";

// ...

function YourMainContent({ themeColor }: { themeColor: string }) {
  // ...

  //🪁 Generative UI: https://docs.copilotkit.ai/coagents/generative-ui
  useCopilotAction({
    name: "get_weather",
    description: "Get the weather for a given location.",
    available: "disabled",
    parameters: [
      { name: "location", type: "string", required: true },
    ],
    render: ({ args }) => {
      return
    },
  });

  return ( ... )
Then try asking the agent to get the weather for a location. You should see the custom UI component that we added render the get weather tool call and display the arguments that were passed to the tool.
Human-in-the-loop (HITL) allows agents to request human input or approval during execution, making AI systems more reliable and trustworthy. This pattern is essential when building AI applications that need to handle complex decisions or actions that require human judgment.
You can learn more about Human in the Loop here on CopilotKit docs.
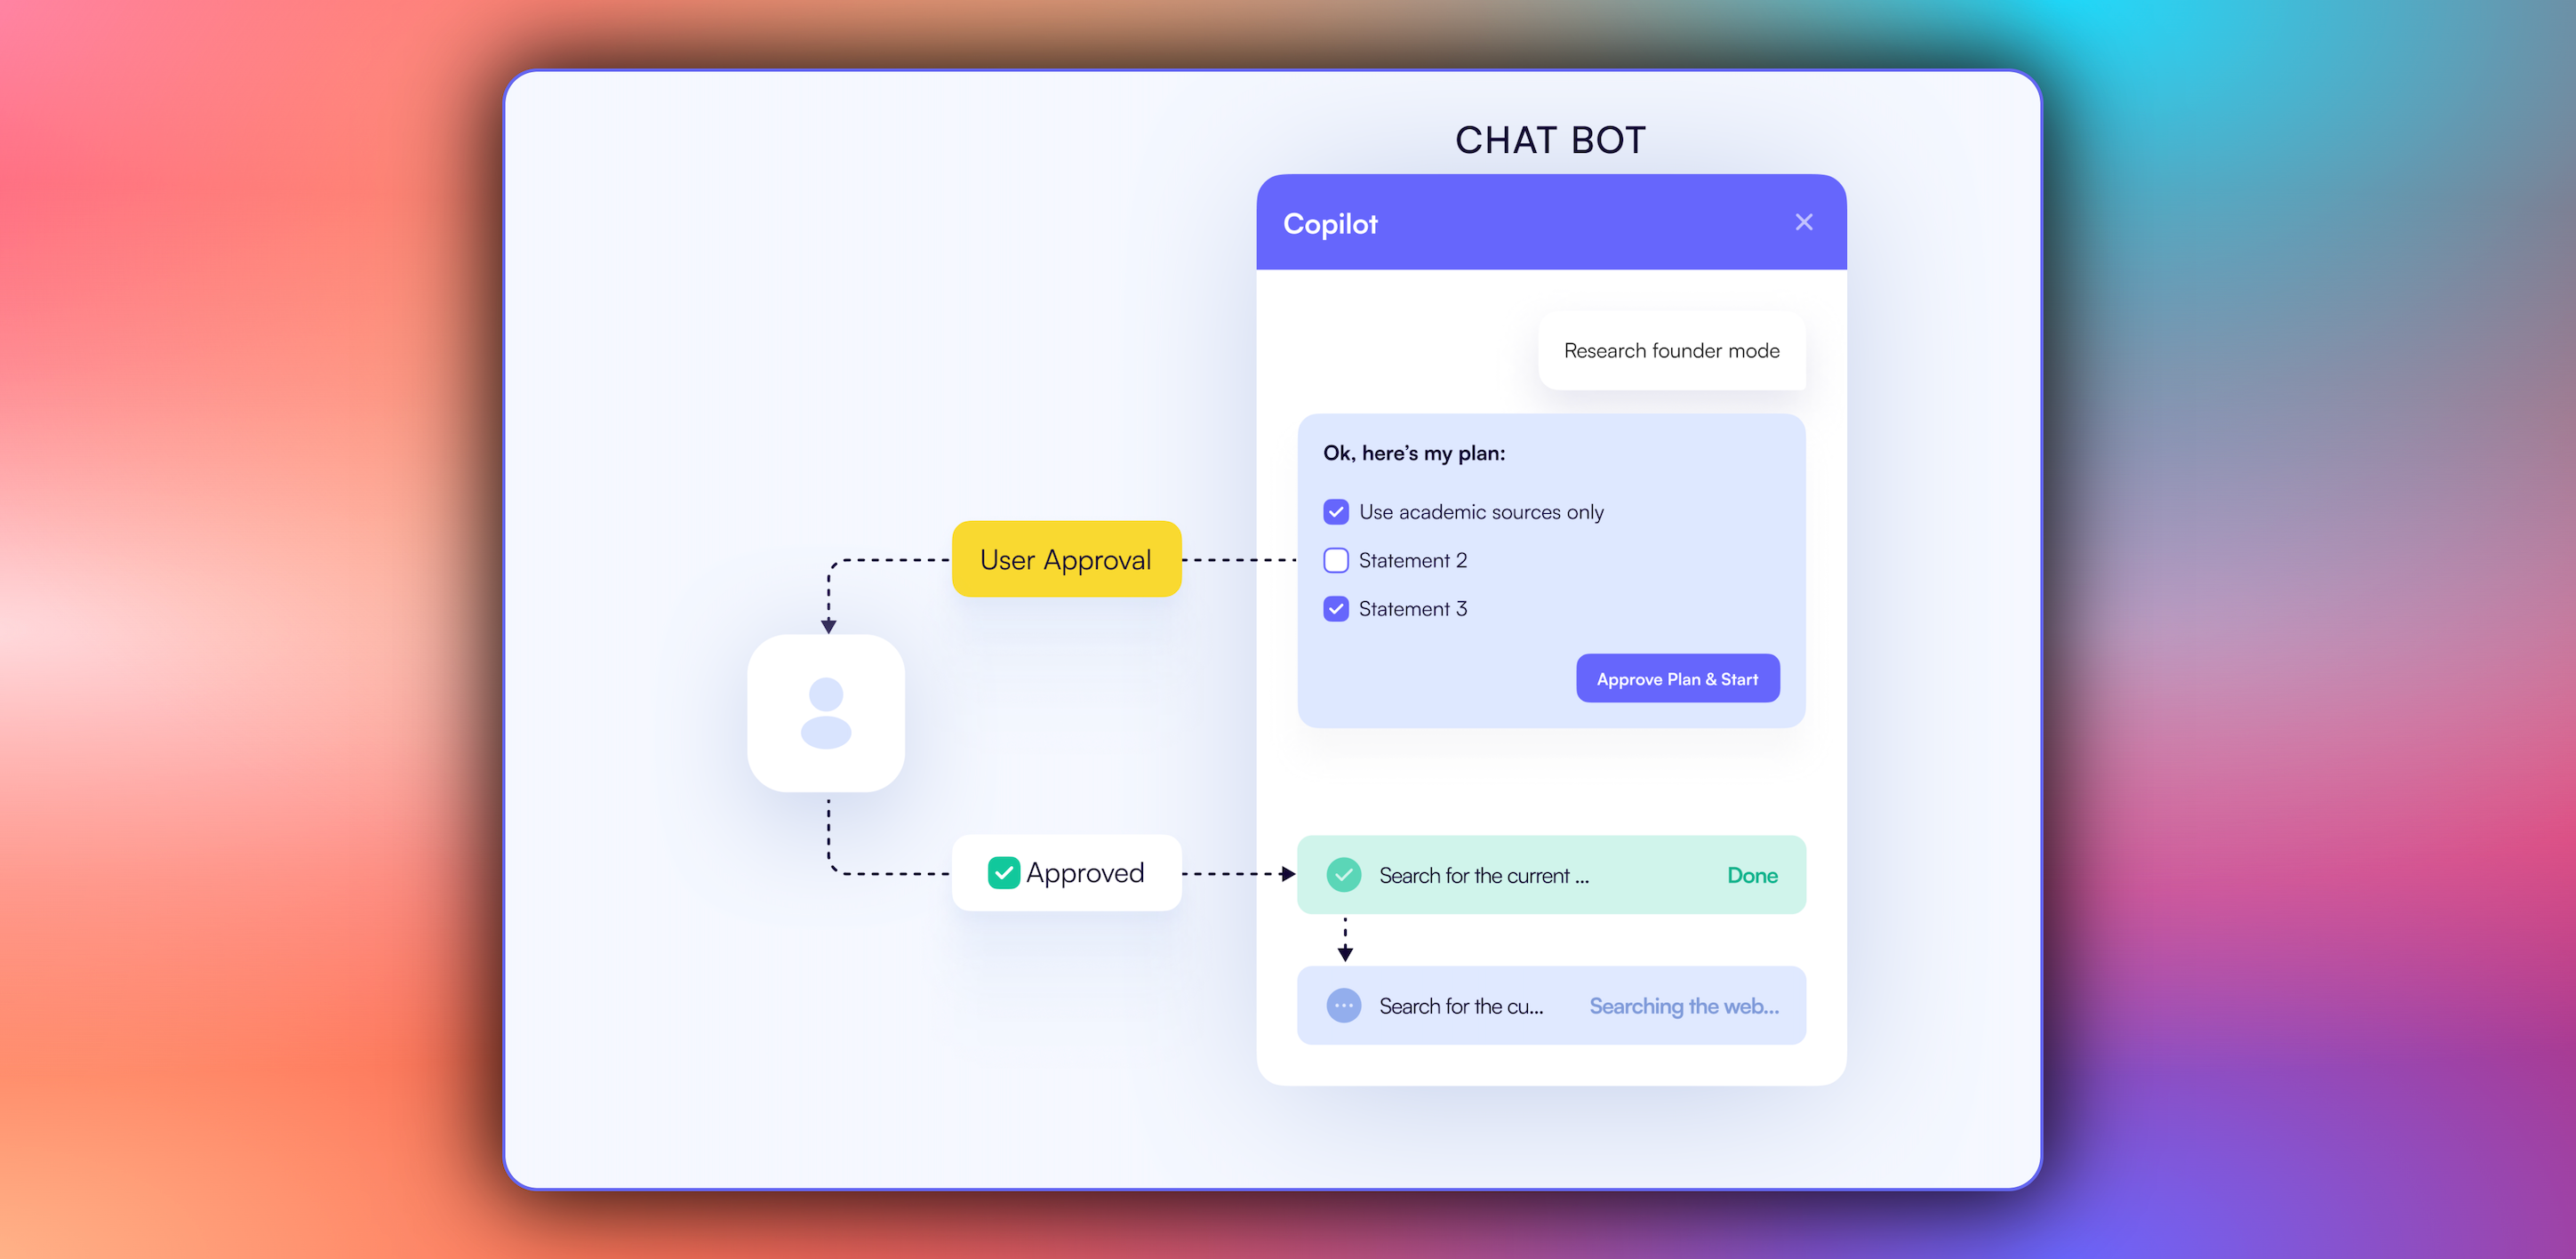
To implement Human-in-the-Loop (HITL) in the frontend, you need to use the CopilotKit useCopilotKitAction hook with the renderAndWaitForResponse method which allows returning values asynchronously from the render function, as shown in the src/app/page.tsx file.
import { MoonCard } from "@/components/moon";
import { useCopilotAction } from "@copilotkit/react-core";
// ...
function YourMainContent({ themeColor }: { themeColor: string }) {
// ...
// 🪁 Human In the Loop: https://docs.copilotkit.ai/pydantic-ai/human-in-the-loop
useCopilotAction(
{
name: "go_to_moon",
description: "Go to the moon on request.",
renderAndWaitForResponse: ({ respond, status }) => {
return ;
},
},
[themeColor],
);
return (
// ...
);
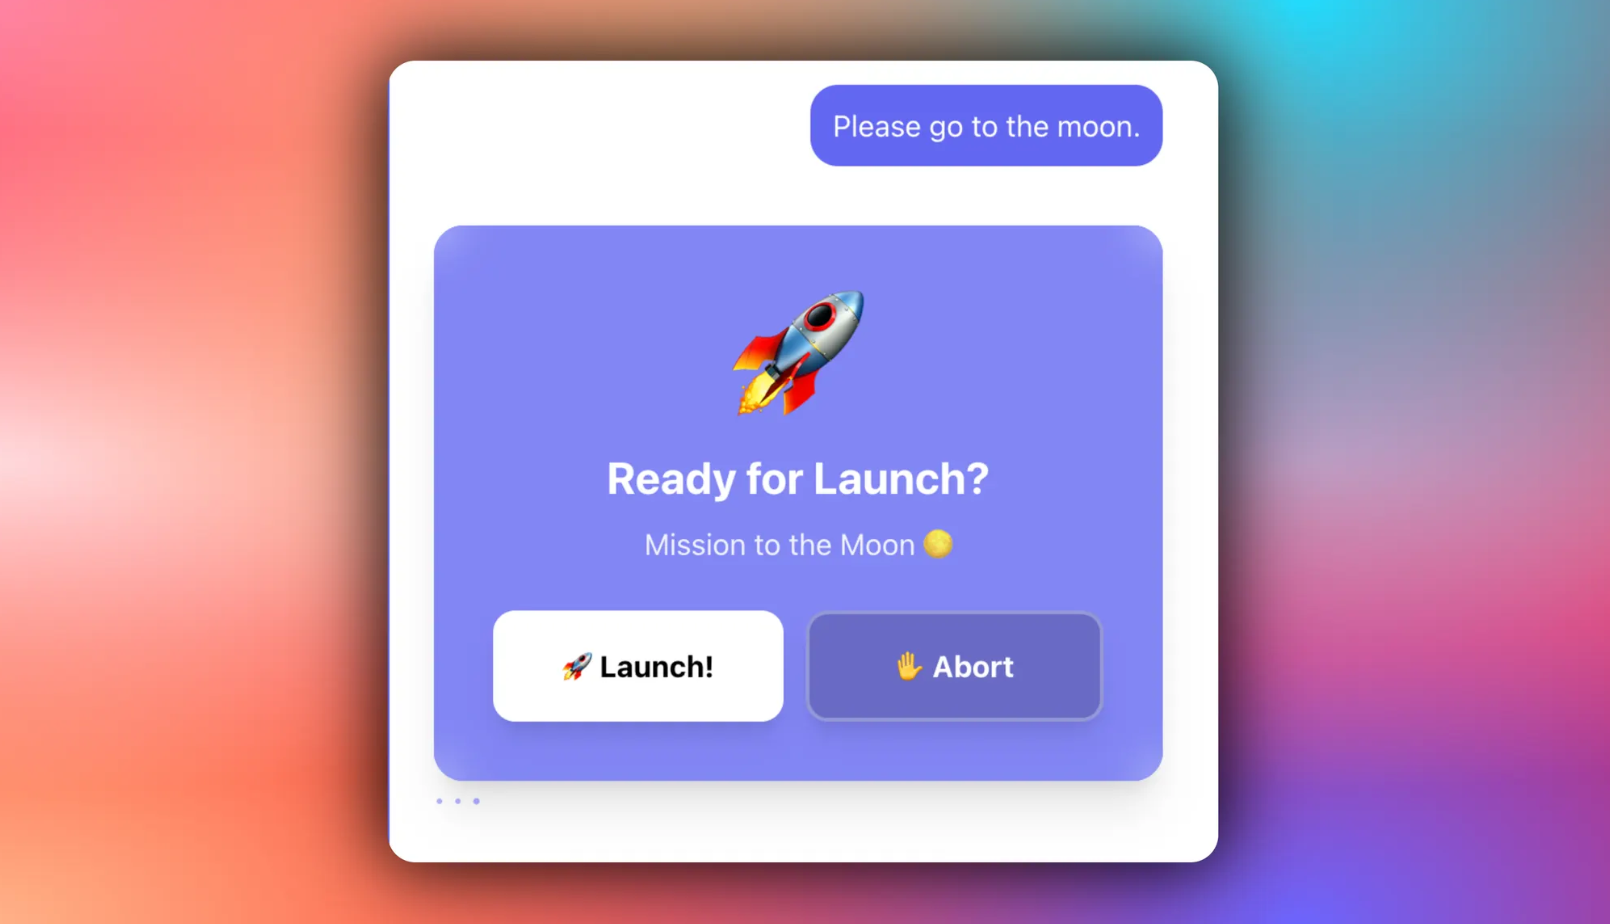
}Then try asking the agent to go to the moon. Then the agent will trigger frontend actions by tool/action name to request human input or feedback during execution, and you are prompted with a choice (rendered inside the chat UI). Then you can choose by pressing a button in the chat UI, as shown below.
Once you have synced your Microsoft Agent Framework agent state with the frontend, stream your ADK agent responses or results in the frontend.
To stream your Microsoft Agent Framework agent responses or results in the frontend, pass the agent’s state field values to the frontend components, as shown below.
"use client";
import { useCoAgent } from "@copilotkit/react-core";
import { ProverbsCard } from "@/components/proverbs";
// State of the agent, make sure this aligns with your agent's state.
type AgentState = {
proverbs: string[];
}
function YourMainContent({ themeColor }: { themeColor: string }) {
// 🪁 Shared State: https://docs.copilotkit.ai/coagents/shared-state
const { state, setState } = useCoAgent<AgentState>({
name: "my_agent",
initialState: {
proverbs: [
"CopilotKit may be new, but its the best thing since sliced bread.",
],
},
});
// ...
return (
<div
style={{ backgroundColor: themeColor }}
className="h-screen flex justify-center items-center flex-col transition-colors duration-300"
>
<ProverbsCard state={state} setState={setState} />
</div>
);
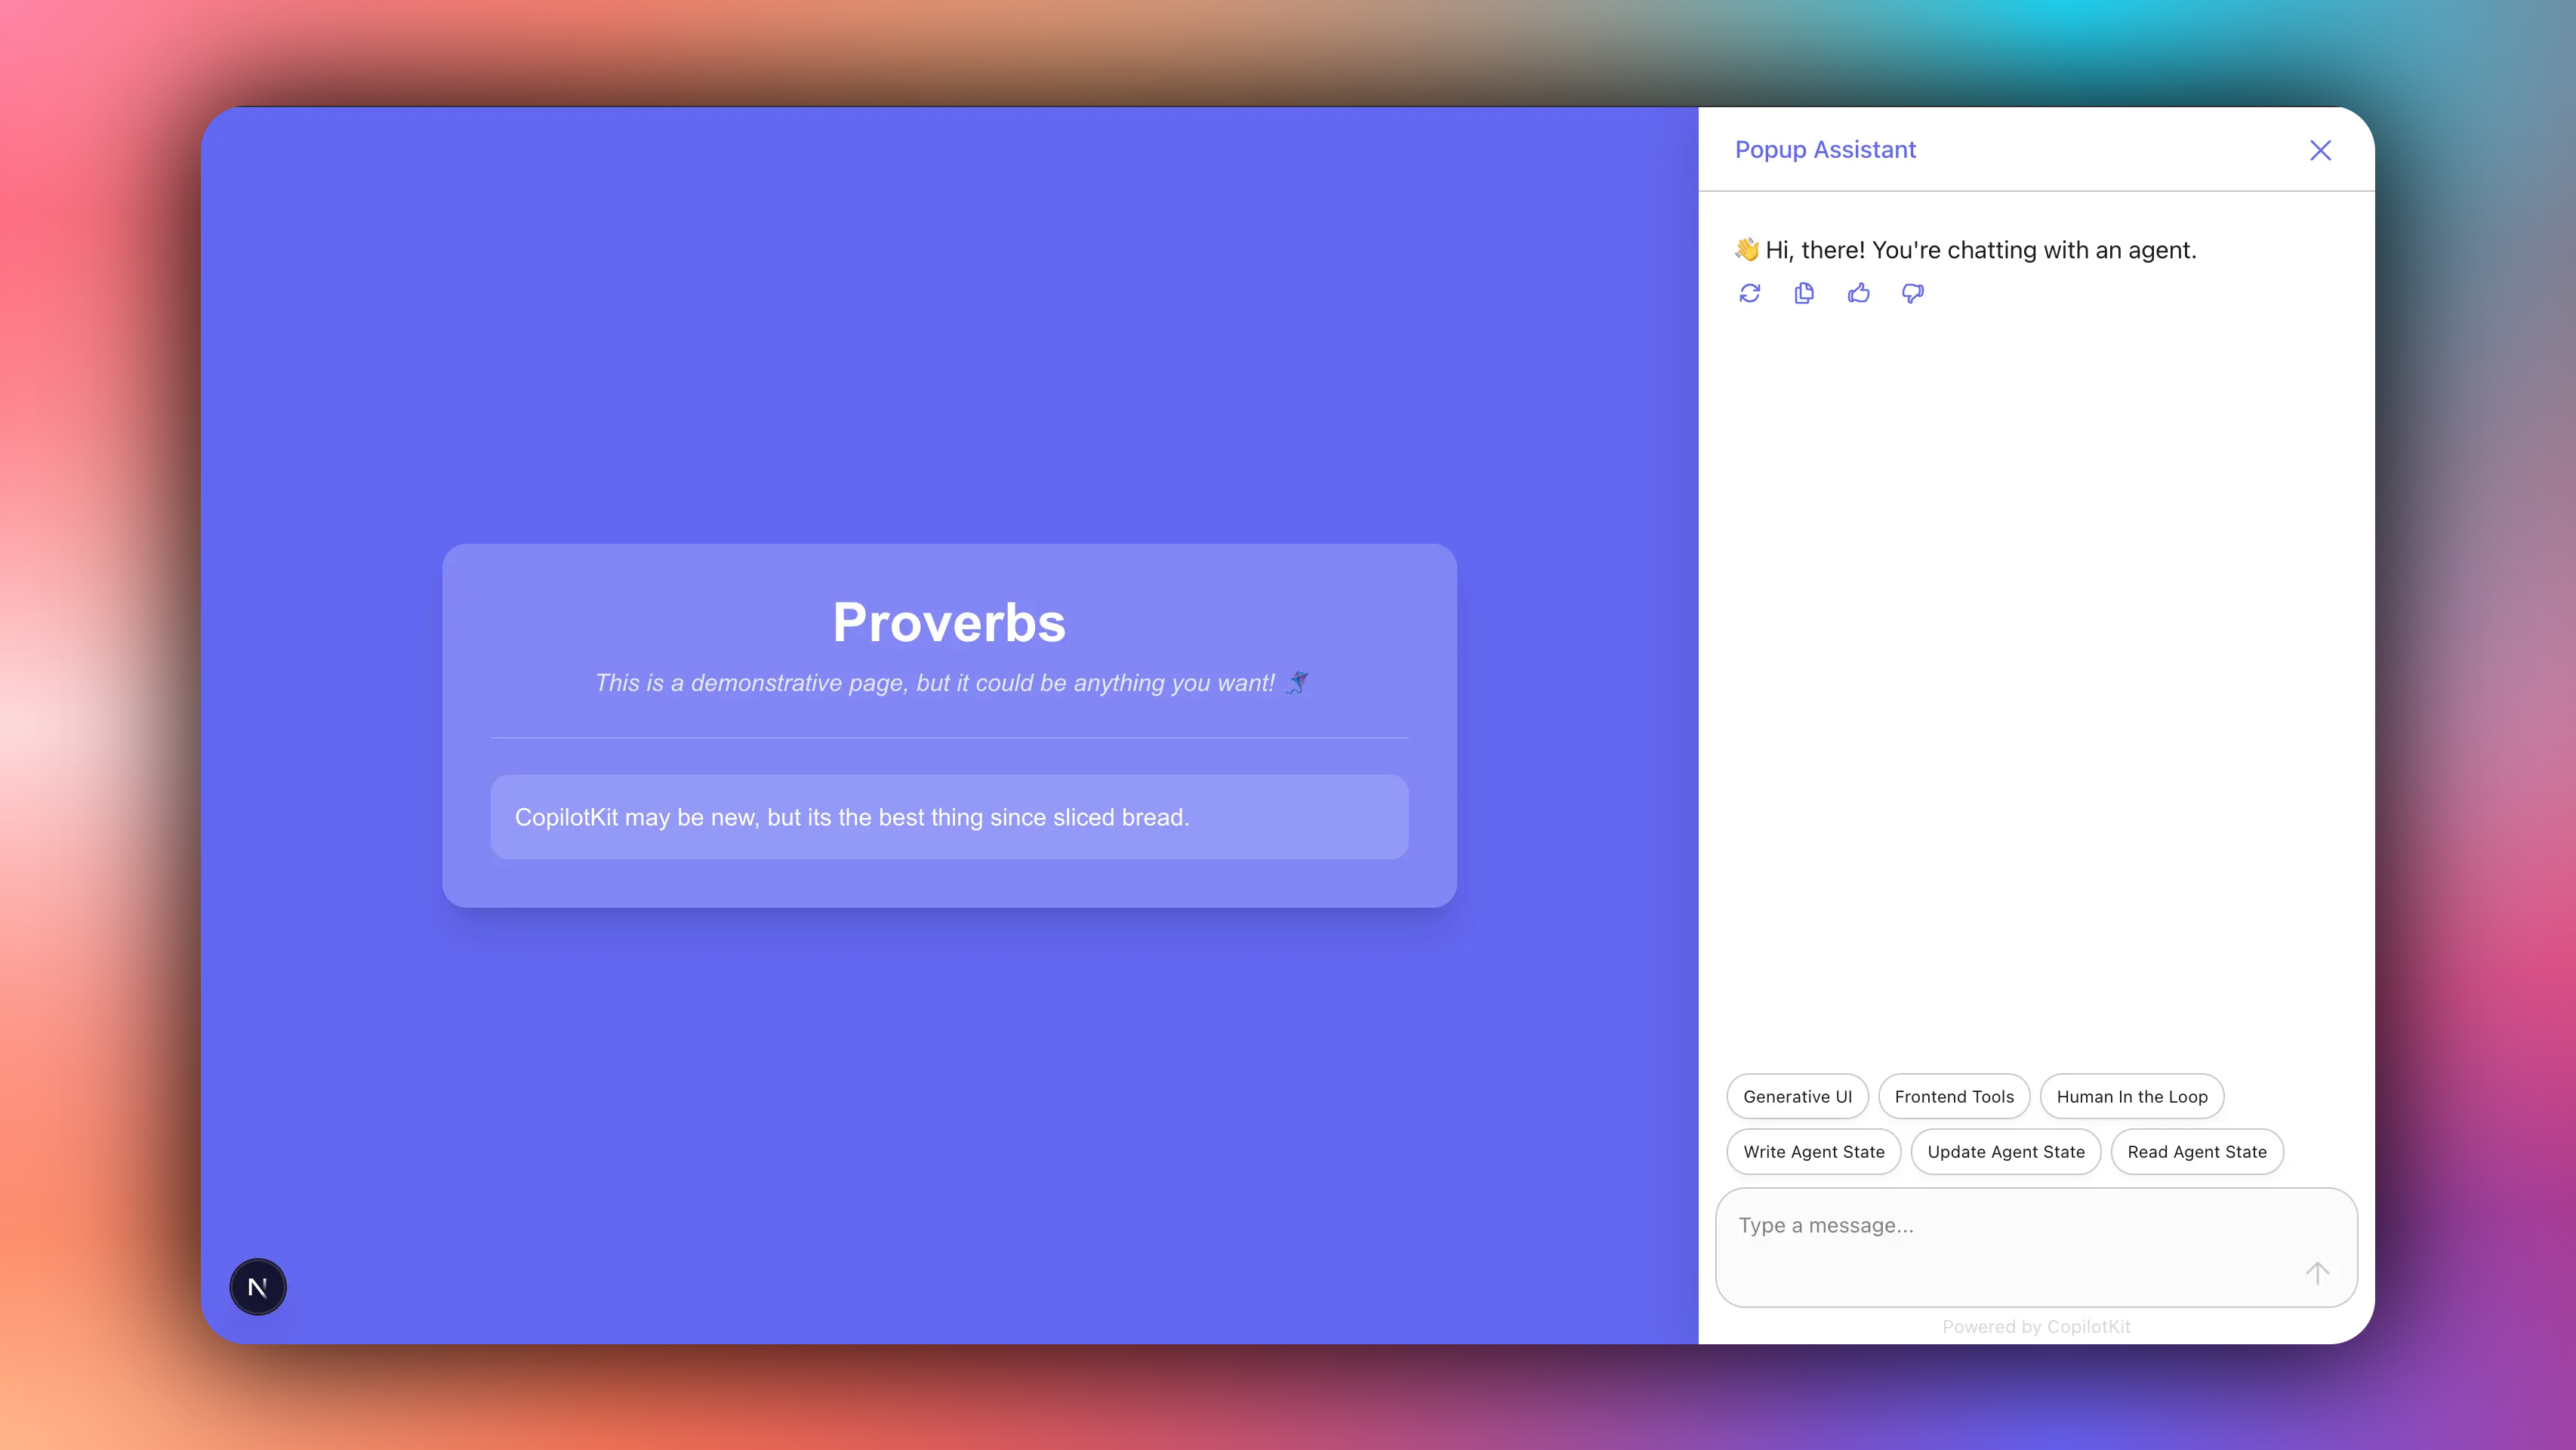
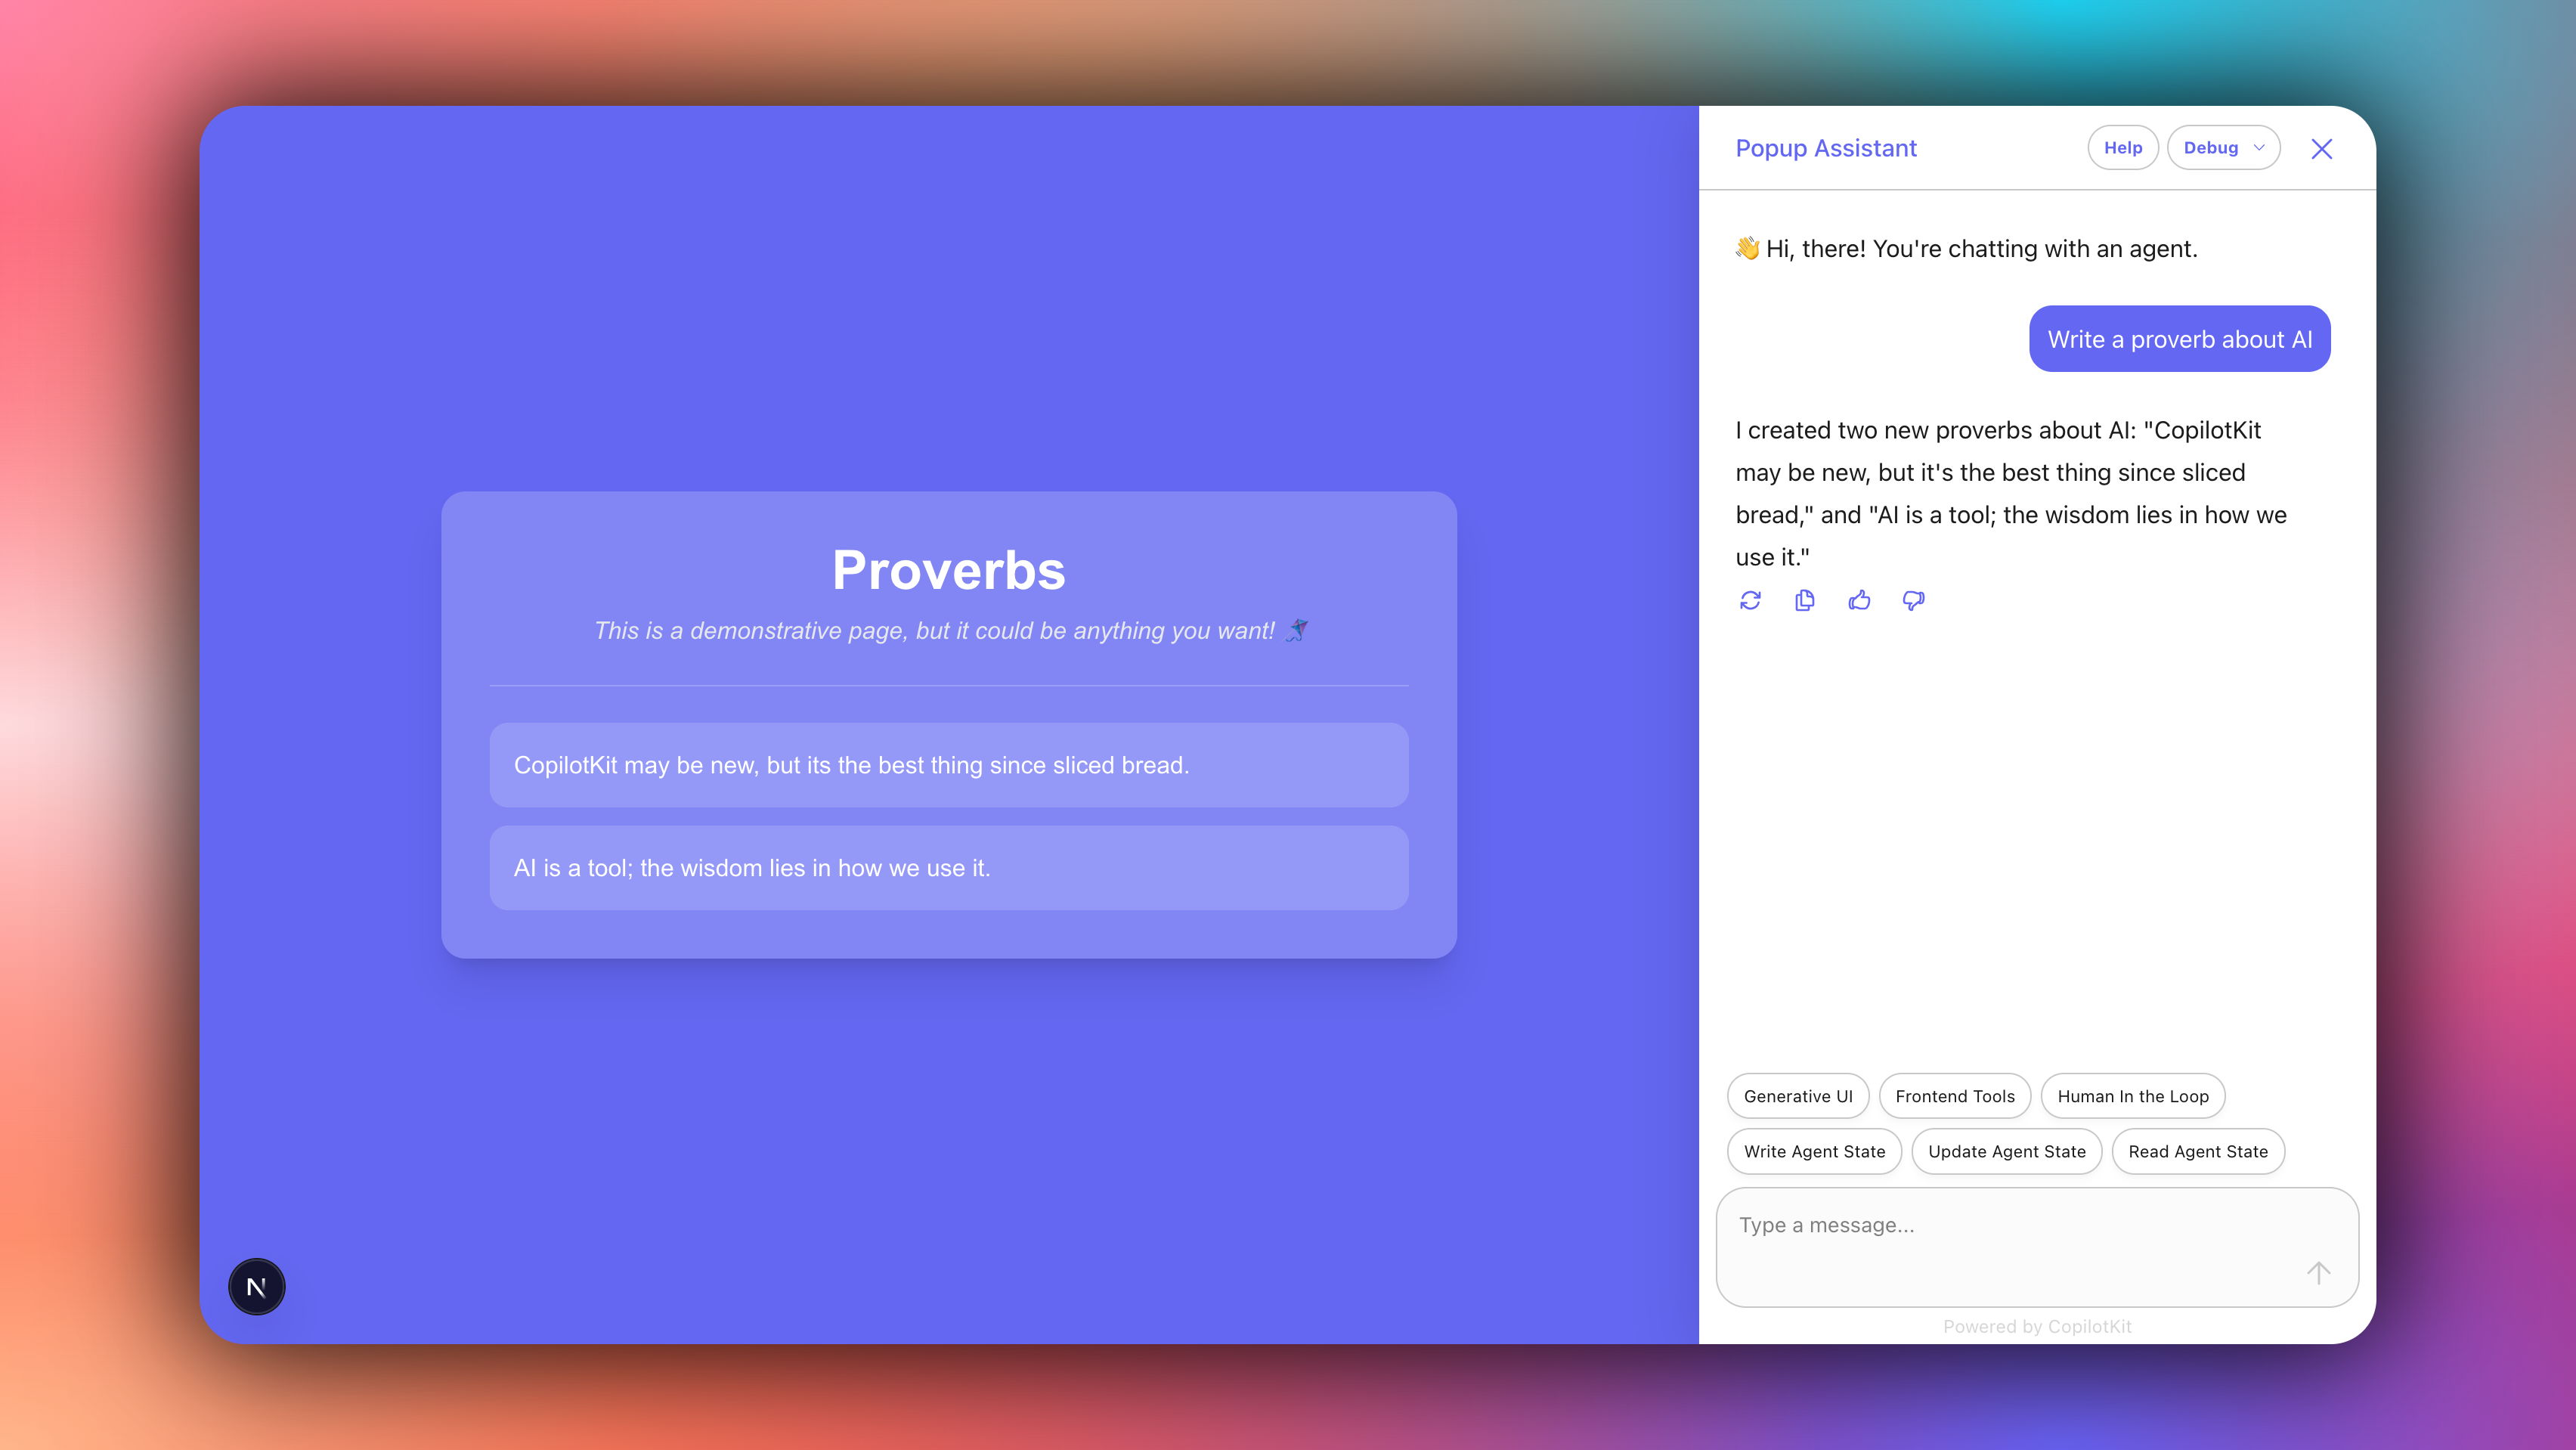
}If you query your Microsoft Agent Framework agent, you should see the agent’s response or results streaming in the UI, as shown below.
In this guide, we have walked through the steps of building a frontend for your Microsoft Agent Framework agent using AG-UI protocol and CopilotKit.
While we’ve explored a couple of features, we have barely scratched the surface of the countless use cases for CopilotKit, ranging from building interactive AI chatbots to building agentic solutions—in essence, CopilotKit lets you add a ton of useful AI capabilities to your products in minutes.
Hopefully, this guide makes it easier for you to integrate AI-powered Copilots into your existing application.
Follow CopilotKit on Twitter and say hi, and if you'd like to build something cool, join the Discord community.
Subscribe to our blog and get updates on CopilotKit in your inbox.
