
— Slack, MS Teams, Discord, Google Chat & Self-Learning· Early access
Get early access
AI Agents have unlocked powerful use cases, so developers are automating complex workflows.
But sometimes you just want to build smart stuff without all the extra complexity, which can be achieved using agentless architecture.
Today, we will learn about what it means, how MCP fits in the whole scenario, and how to build our own agentless applications using CopilotKit (framework) with Composio servers.
Let's jump in.
In a nutshell, we are covering these topics in detail.
Note: Copilotkit (framework for building AI Copilots) recently launched built-in support for MCP, which is what we will use in this guide.
To make things easier, we will connect it to Composio, which provides ready-to-use MCP servers with built-in authentication and minimal setup.
We will be covering a lot, so let's get started.
[Update] By the way, if you are building with MCP and CopilotKit, make sure you check out the new Vibe Coding Server built with Tadata, designed to make coding agents code reliably with CopilotKit.
Check out the Video here:
Agentless architecture refers to a system design where the frontend (usually a web or mobile client) directly interacts with an intelligent backend (such as an MCP server), without deploying or maintaining a custom agent to manage state, tools, or actions.
In the context of AI applications, this means your React frontend can send structured prompts and context to an MCP-compatible server. And receive intelligent responses without needing to host your own AI agent.
Instead of writing backend logic to handle tools, memory, or actions (which are all part of MCP), you simply send a request to an existing MCP server, and it handles the smart stuff for you.
Let’s say you are building a React-based project management app.
With agentless architecture:
Create a new task for our launch checklist.Task Finalize Launch Assets has been created in the Marketing project.All without hosting your own AI agent or writing orchestration logic. It simply works.
It depends on the complexity of your use case. Here's a quick comparison:
Agentless Architecture | Agent-Based Architecture
  Easy to set up, no backend agent required  | Requires extra setup to host and manage the agent
  Great for simple frontends, static sites, or quick demos   | Best for complex workflows, tools, or apps needing memory
  No built-in memory, mostly stateless | Supports memory, history and evolving context
  Ideal for AI chat UIs, sidekicks, or small assistants  | Perfect for dev agents, RPA bots, and fully autonomous agents
  Only needs access to an MCP-compatible server | Needs its own backend or container runtime
  Easy to scale across users by just deploying the frontend | Needs backend scaling strategy for multiple concurrent agents
My recommendation is to try both and see what works. At least, you will get an idea of the potential problems associated with each.
Now that we have learned about Agentless architecture, let's quickly understand MCP and its core components.
Model Context Protocol (MCP) is a new open protocol that standardizes how applications provide context and tools to LLMs.
Think of it as a universal connector for AI. MCP works as a plugin system for Cursor, which allows you to extend the Agent’s capabilities by connecting it to various data sources and tools.
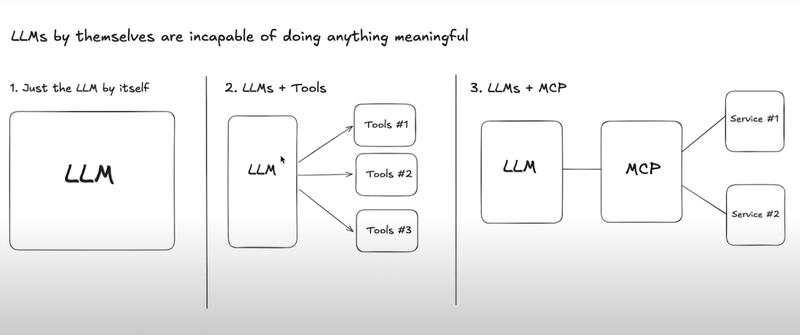
credit goes to Greg Isenburg on YouTube
MCP helps you build agents and complex workflows on top of LLMs.
For example, an MCP server for Obsidian helps AI assistants search and read notes from your Obsidian vault.
Your AI agent can now:
→ Send emails through Gmail
→ Create tasks in Linear
→ Search documents in Notion
→ Post messages in Slack
→ Update records in Salesforce
All by sending natural-language instructions through a standardized interface.
Think about what this means for productivity. Tasks that once required switching between 5+ apps can now happen in a single conversation with your agent.
At its core, MCP follows a client-server architecture where a host application can connect to multiple servers.
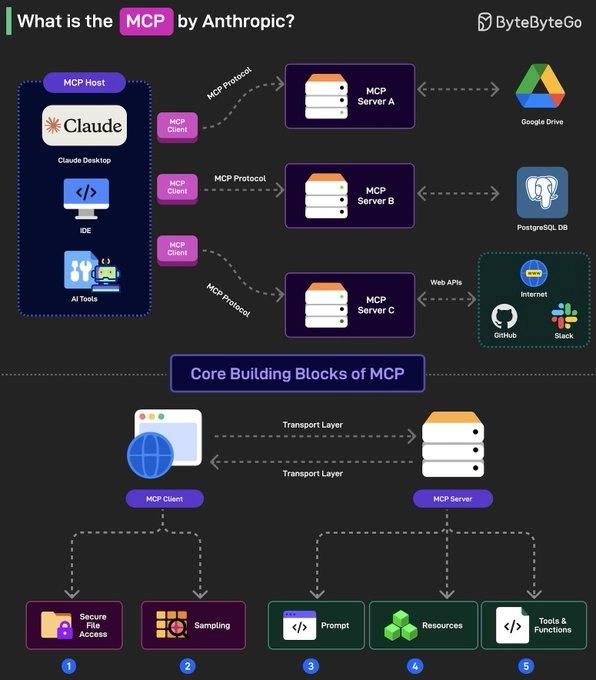
Credit goes to ByteByteGo
Here are the core components of any general MCP Server.
MCP hosts - apps like Claude Desktop, Cursor, Windsurf or AI tools that want to access data via MCP.MCP Clients - protocol clients that maintain 1:1 connections with MCP servers, acting as the communication bridge.MCP Servers - lightweight programs that each expose specific capabilities (like reading files, querying databases...) through the standardized Model Context Protocol.Local Data Sources - files, databases and services on your computer that MCP servers can securely access. For instance, a browser automation MCP server needs access to your browser to work.Remote Services - External APIs and cloud-based systems that MCP servers can connect to.If you're interested in reading about the architecture, check out official docs. It covers protocol layers, connection lifecycle, and error handling with the overall implementation.
We are going to cover everything, but if you're interested in reading more about MCP, check out these two blogs:
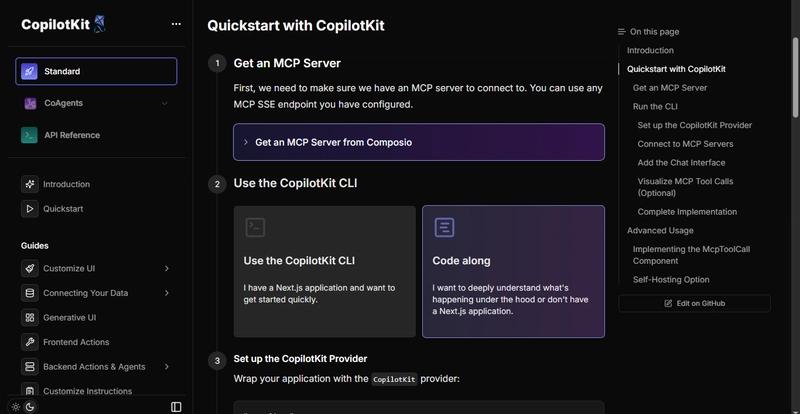
In this section, we will talk about how to add MCP support to your Next.js project using CopilotKit.
We are going to integrate Copilotkit, which has built-in support for the Model Context Protocol (MCP). That will allow us to create a frontend to connect directly to external MCP-compatible servers.
If you're interested in reading it yourself, please read the docs at: docs.copilotkit.ai/guides/model-context-protocol. It's okay if you don't want to; I will be explaining all the steps with concepts in detail.
If you don't have an existing Next.js application, you can create one by using the npx create-next-app@latest command in the terminal.
Once your project is ready, the fastest way to integrate MCP support is by using the CopilotKit CLI. Just run the following command in your terminal.
npx copilotkit@latest init -m MCPThis command does a lot under the hood:
It will guide you to install the required packages and recommend you use the Copilot Cloud to deploy (which requires no extra setup).
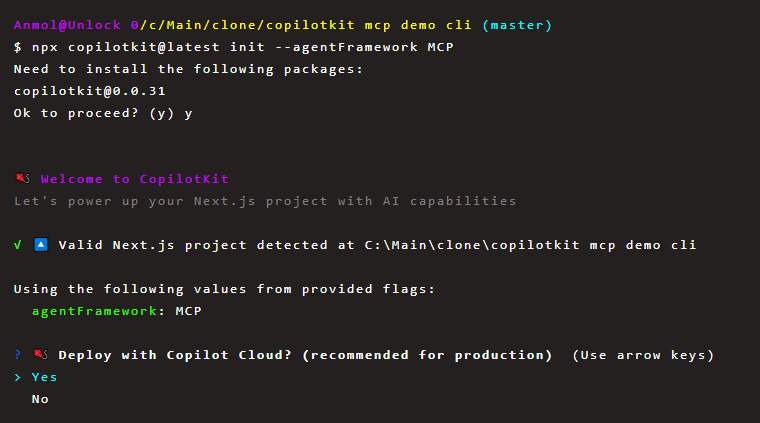
installing using CLI
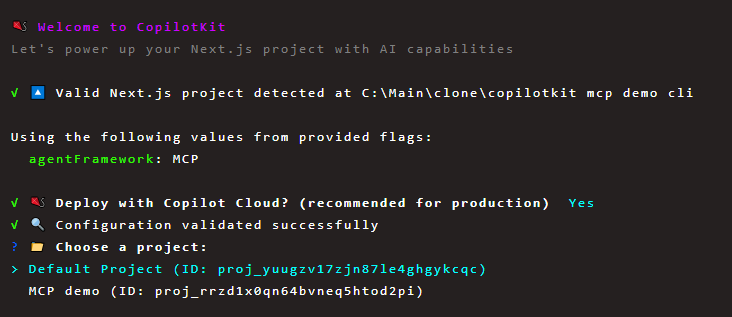
It will validate the configuration and detect if the existing Next.js app is valid. After that, you will get the option of choosing either a default project or mcp demo (which is a showcase project made by the CopilotKit team).
I've tried both with CLI, but we are going to use the default project for the scope of this guide.
It will then prompt you to install shadcn/ui for built-in component styling.
Since we are using React 19, which is very new. Some libraries may not officially support it yet, and npm might show errors because of version conflicts (called peer dependency issues).
To fix that, the CLI suggests using --legacy-peer-deps, which tells npm to ignore those version warnings and continue installing anyway.
It's a workaround that usually works fine, especially for newer React versions still gaining support.
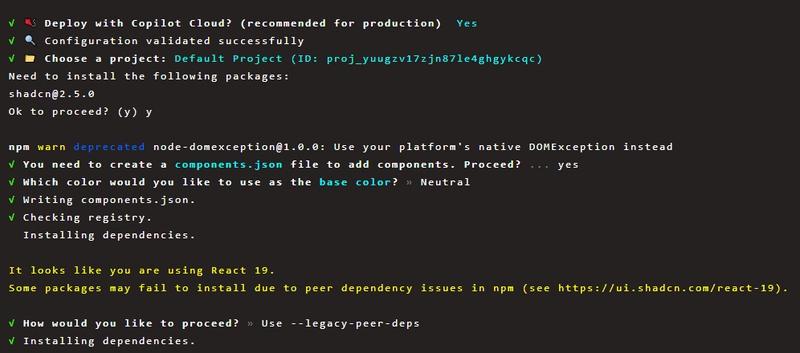
installing shadcn ui
After installation is complete, you will see a summary of what's been added.
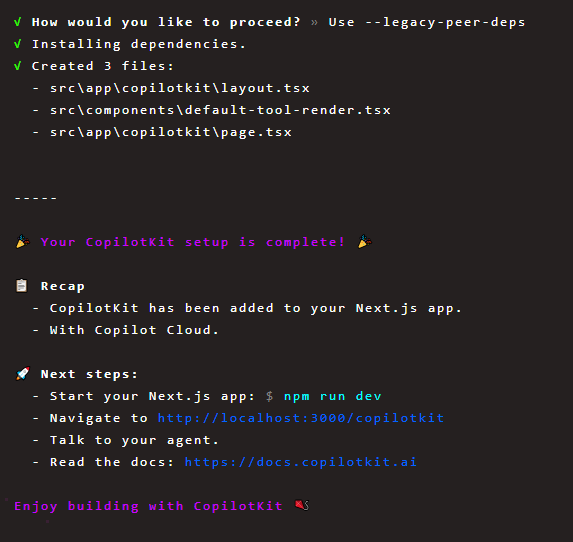
You can start the server locally using npm run dev and navigate to http://localhost:3000/copilotkit to view your MCP-ready frontend.
📧 Connecting to the Gmail MCP Server (Demo)
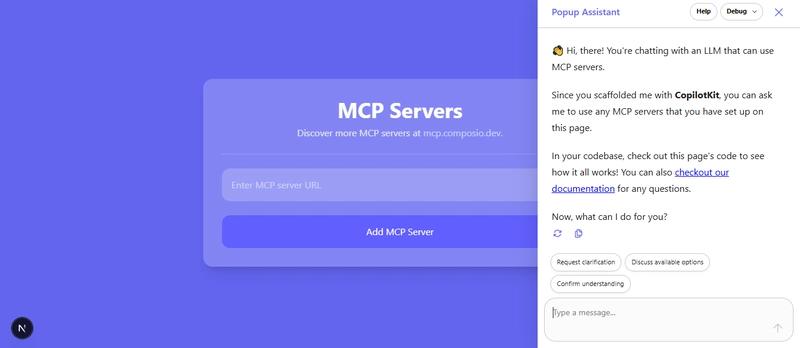
You will need to enter the SSE URL of the MCP server you prefer to use. You can find a list of 100+ available managed MCP servers at mcp.composio.dev.
Let's check the flow in brief. I'm using the Gmail server at mcp.composio.dev/gmail.

Copy the MCP server URL that you generated from the composio server page and paste it into the placeholder field (Enter MCP server URL) on the page. This is sensitive and for personal use only, so that's why I've blurred it.
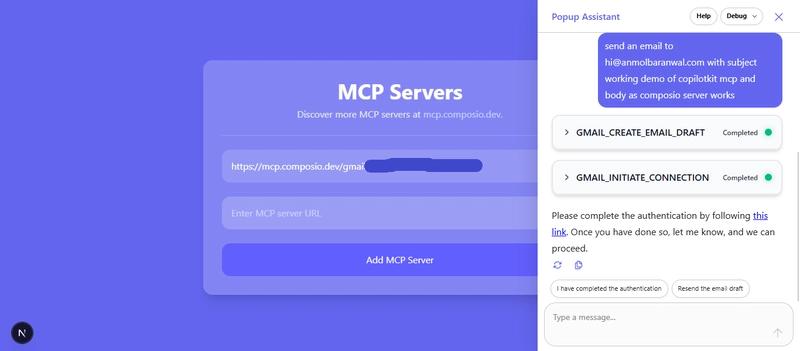
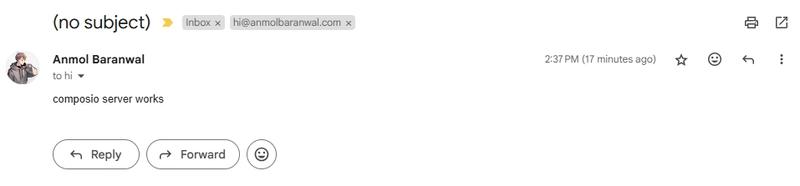
I've given a prompt of sending an email to hi@anmolbaranwal.com with the subject working demo of copilotkit mcp and saying composio server works in the body of the email.
It will call the appropriate MCP server (if you have multiple of those) and it will accordingly use the correct action based on your prompt.
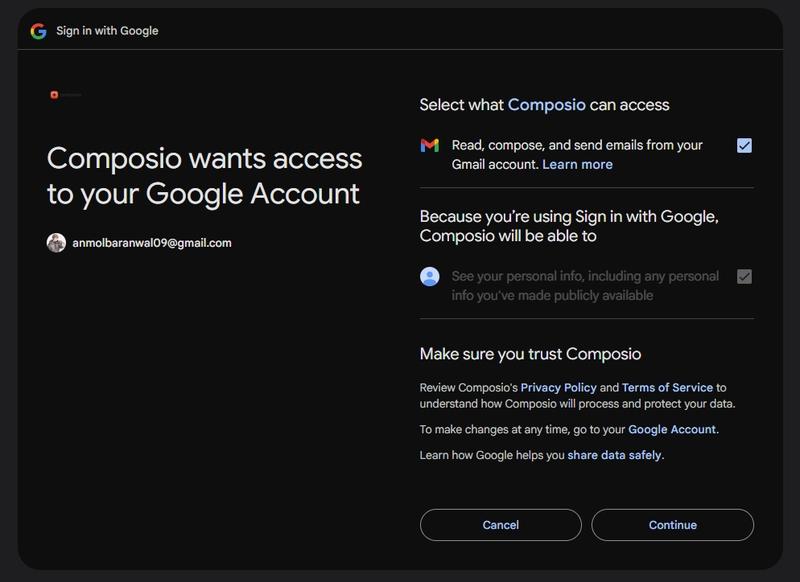
Since there is no active connection, it will first establish one (as shown in the above image). You will need to authenticate by copying the OAuth URL in the browser.
💡 It's a good idea to test with a dummy account first, especially while experimenting. Once you're satisfied, you can automate things with your primary account.

You will have to provide access to the server so it can take action based on your prompt.
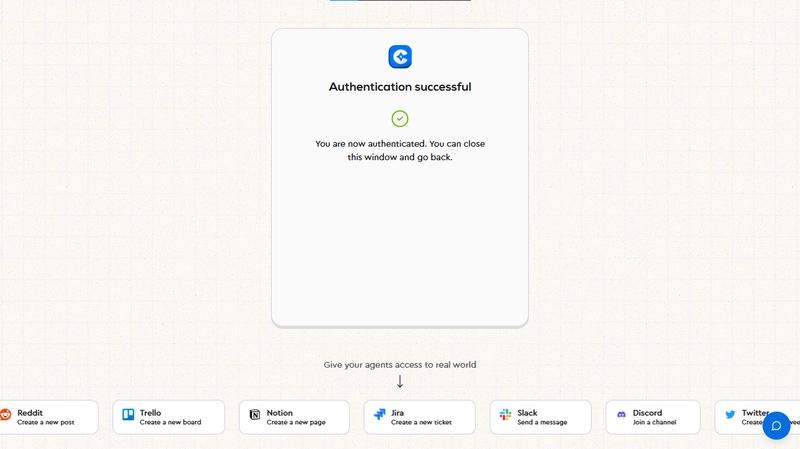
Once you're authenticated, you will see confirmation in the browser.
You just need to type done so that the agent can verify the active connection. The part that surprised me is that it still asks for approval before sending the email, which makes sure you're still in control.
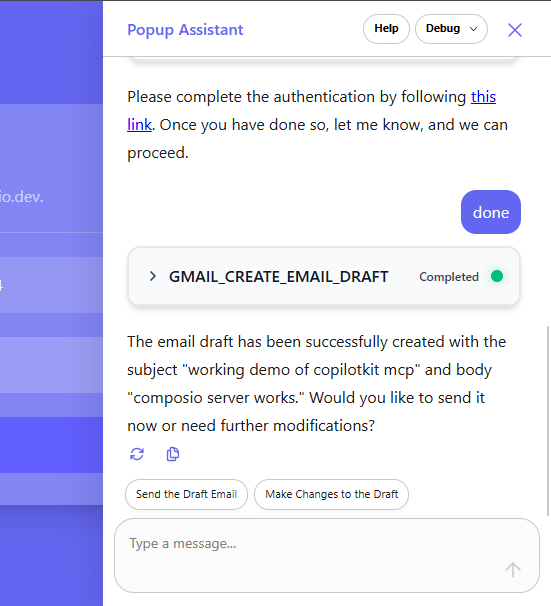
Upon approval, the agent proceeds to send the email.

Somehow it didn't provide the subject, but we received the email with a proper body response.
Yay! 🎉 You have now completed an end-to-end integration with an MCP server using CopilotKit.
You can do the same with all the other MCP servers and create multi-step workflows.
Up next: We will build this flow manually from scratch to understand the underlying components better.
Let’s walk through how to set up the CopilotKit integration to use MCP servers from scratch. This will help you understand the architecture and flow end to end.
If you already have an existing Next.js project, skip to Step 2.
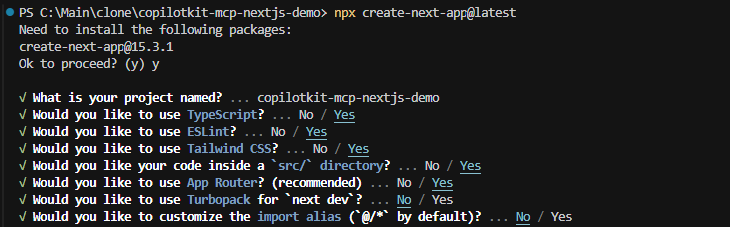
If you don’t have a frontend, you can create a new Next.js project with TypeScript and Tailwind CSS by using the following command.
npx create-next-app@latestThis is what your project structure will look like. We will be using the latest Next.js version along with the App Router. I've added some more files (for my style preferences), which is something I do for every project, so it's not mandatory.
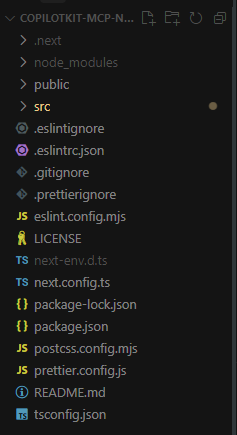
🧠 You might notice there is no tailwind.config.js. That’s because, with Tailwind CSS V4, we can now customize styles directly in globals.css, and new next.js apps don't need the config file anymore.
Install the necessary CopilotKit packages
npm install @copilotkit/react-core @copilotkit/react-ui@copilotkit/react-core provides the core context and logic to connect your React app with the CopilotKit backend and MCP servers.@copilotkit/react-ui offers ready-made UI components like <CopilotChat /> to build AI chat or assistant interfaces quickly.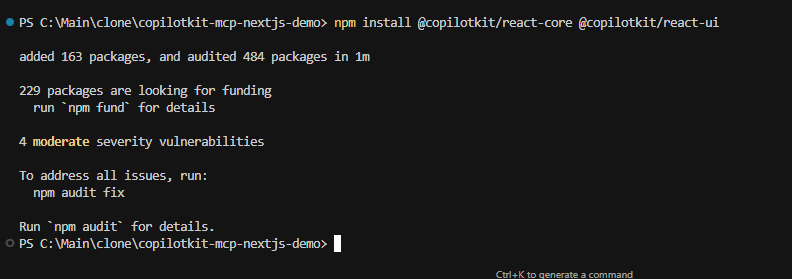
The <CopilotKit> component must wrap the Copilot-aware parts of your application. In most cases, it's best to place it around the entire app, like in app/layout.tsx.
import type { Metadata } from 'next'
import './globals.css'

import '@copilotkit/react-ui/styles.css'
import './globals.css'
import { CopilotKit } from '@copilotkit/react-core'

export const metadata: Metadata = {
  title: 'CopilotKit MCP Demo',
  description: 'CopilotKit MCP Demo',
}

export default function RootLayout({
  children,
}: Readonly<{
  children: React.ReactNode
}>) {
  return (
    <html lang="en">
      <body
        className={
          'relative flex flex-col overflow-x-hidden font-sans antialiased'
        }
        suppressHydrationWarning
      >
        <CopilotKit publicApiKey="<replace_with_your_own>">
          {children}
        </CopilotKit>
      </body>
    </html>
  )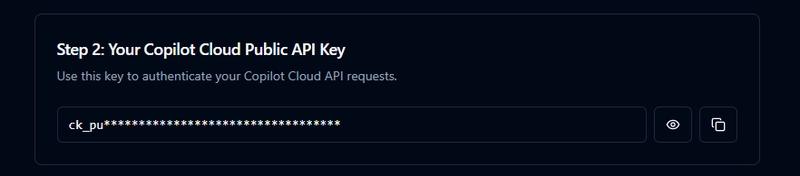
}Replace <replace_with_your_own> with your API key from cloud.copilotkit.ai. It's free and recommended if you're building for production.
If you're interested in configuring your self-hosted runtime with MCP servers, please read the docs.
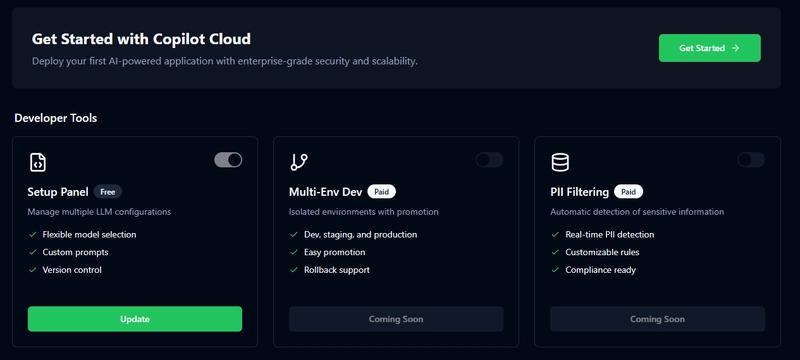
Just click on Get Started, and you will find a public API key.
Now we will create a helper component that connects your app to an MCP server. Create a new file at src\components\McpServerManager.tsx.
'use client'

import { useCopilotChat } from '@copilotkit/react-core'
import { useEffect } from 'react'

function McpServerManager() {
  const { setMcpServers } = useCopilotChat()

  useEffect(() => {
    setMcpServers([
      {
        // Try a sample MCP server at https://mcp.composio.dev/
        endpoint: 'your_mcp_sse_url',
      },
    ])
  }, [setMcpServers])

  return null
}

export default McpServerManagerThis McpServerManager component connects your app to an MCP server.
useEffect runs), it tells CopilotKit which MCP server to connect to by providing the server URL.return null), it's just setting up the connection in the background.It configures your app to talk to your MCP server automatically when the page loads. You just need to set the specific MCP endpoint (your_mcp_sse_url) for tool access in the endpoint property.
The ChatInterface component creates the actual chat UI and makes sure the chat knows about the MCP server you want to connect to. Create a new file at src\components\ChatInterface.tsx.
'use client'

import { CopilotChat } from '@copilotkit/react-ui'
import McpServerManager from './McpServerManager'

export default function ChatInterface() {
  return (
    <div className="flex h-screen p-4">
      <McpServerManager />
      <CopilotChat
        instructions="You are a helpful assistant with access to MCP servers."
        className="w-full flex-grow rounded-lg"
      />
    </div>
  )
}Here's a simple explanation of what's happening.
McpServerManager runs when the page loads and tells CopilotKit which MCP server to use.CopilotChat displays the chat box where users can talk to the AI.instructions tell the AI what kind of assistant it should be.To monitor tool calls triggered by the assistant, add a ToolRenderer component. This is completely optional but useful during development.
Create a new file at src\components\ToolRenderer.tsx.
'use client'

import {
  useCopilotAction,
  CatchAllActionRenderProps,
} from '@copilotkit/react-core'
import McpToolCall from './McpToolCall'

export function ToolRenderer() {
  useCopilotAction({
    /**
     * The asterisk (*) matches all tool calls
     */
    name: '*',
    render: ({ name, status, args, result }: CatchAllActionRenderProps<[]>) => (
      <McpToolCall status={status} name={name} args={args} result={result} />
    ),
  })
  return null
}Then create McpToolCall.tsx (under the same components directory). This displays the tool name, status, arguments, and results in a collapsible UI.
It's a visual debug component that shows tool invocation details like what the assistant tried to do and what it got back.
/* eslint-disable @typescript-eslint/no-explicit-any */
'use client'

import * as React from 'react'

interface ToolCallProps {
  status: 'complete' | 'inProgress' | 'executing'
  name?: string
  args?: any
  result?: any
}

export default function McpToolCall({
  status,
  name = '',
  args,
  result,
}: ToolCallProps) {
  const [isOpen, setIsOpen] = React.useState(false)

  const classes = {
    container:
      'bg-white rounded-xl overflow-hidden w-full border-2 border-gray-200 shadow-md transition-all duration-200 hover:shadow-xl my-1',
    header:
      'p-4 flex items-center cursor-pointer group bg-gray-50 border-b border-gray-200',
    title: 'text-gray-900 font-semibold overflow-hidden text-ellipsis',
    statusContainer: 'ml-auto flex items-center gap-2',
    statusText: 'text-xs text-gray-700 font-medium mr-1',
    content: 'px-5 pb-5 pt-3 text-gray-800 font-mono text-xs',
    section: 'mb-4',
    sectionTitle:
      'text-gray-700 text-xs uppercase tracking-wider mb-2 font-sans font-bold',
    codeBlock:
      'whitespace-pre-wrap max-h-[200px] overflow-auto text-gray-900 bg-gray-50 p-3 rounded border border-gray-200',
    chevron: {
      base: 'text-gray-700 mr-2 transition-transform duration-200',
      open: 'rotate-90',
      hover: 'group-hover:text-gray-900',
    },
    contentWrapper: {
      base: 'overflow-hidden transition-all duration-300 ease-in-out',
      open: 'max-h-[600px] opacity-100',
      closed: 'max-h-0 opacity-0',
    },
  }

  // Status indicator colors
  const statusColors = {
    complete: 'bg-emerald-500 shadow-emerald-500/40',
    inProgress: 'bg-amber-500 shadow-amber-500/40',
    executing: 'bg-blue-500 shadow-blue-500/40',
  }

  // Simplified format function
  const format = (content: any): React.ReactNode => {
    if (!content) return null
    return typeof content === 'object' ? (
      <span>{JSON.stringify(content, null, 2)}</span>
    ) : (
      <span>{String(content)}</span>
    )
  }

  const getStatusColor = () => {
    const baseColor = statusColors[status].split(' ')[0]
    const shadowColor = statusColors[status].split(' ')[1]
    return `${baseColor} ${status === 'inProgress' || status === 'executing' ? 'animate-pulse' : ''} shadow-[0_0_10px] ${shadowColor}`
  }

  return (
    <div className={classes.container}>
      <div className={classes.header} onClick={() => setIsOpen(!isOpen)}>
        <ChevronRight isOpen={isOpen} chevronClasses={classes.chevron} />
        <span className={classes.title}>{name || 'MCP Tool Call'}</span>
        <div className={classes.statusContainer}>
          <span className={classes.statusText}>
            {status === 'complete'
              ? 'Completed'
              : status === 'inProgress'
                ? 'In Progress'
                : 'Executing'}
          </span>
          <div className={`h-3 w-3 rounded-full ${getStatusColor()}`} />
        </div>
      </div>

      <div
        className={`${classes.contentWrapper.base} ${isOpen ? classes.contentWrapper.open : classes.contentWrapper.closed}`}
      >
        <div className={classes.content}>
          <div className={classes.section}>
            <div className={classes.sectionTitle}>Name</div>
            <pre className={classes.codeBlock}>{name}</pre>
          </div>
          {args && (
            <div className={classes.section}>
              <div className={classes.sectionTitle}>Parameters</div>
              <pre className={classes.codeBlock}>{format(args)}</pre>
            </div>
          )}

          {status === 'complete' && result && (
            <div className={classes.section}>
              <div className={classes.sectionTitle}>Result</div>
              <pre className={classes.codeBlock}>{format(result)}</pre>
            </div>
          )}
        </div>
      </div>
    </div>
  )
}

const ChevronRight = ({
  isOpen,
  chevronClasses,
}: {
  isOpen: boolean
  chevronClasses: any
}) => {
  return (
    <svg
      width="16"
      height="16"
      viewBox="0 0 24 24"
      fill="none"
      xmlns="http://www.w3.org/2000/svg"
      className={`${chevronClasses.base} ${isOpen ? chevronClasses.open : ''} ${chevronClasses.hover}`}
      stroke="currentColor"
      strokeWidth="2.5"
      strokeLinecap="round"
      strokeLinejoin="round"
    >
      <polyline points="9 18 15 12 9 6"></polyline>
    </svg>
  )
}After creating all the individual components, it's time to combine all of these under src/app/page.tsx.
'use client'

import { CopilotChat } from '@copilotkit/react-ui'
import McpServerManager from '../components/McpServerManager'
import { ToolRenderer } from '../components/ToolRenderer'

export default function Page() {
  return (
    <div className="flex h-screen p-4">
      <McpServerManager />
      <CopilotChat
        instructions="You are a helpful assistant with access to MCP servers."
        className="w-full flex-grow rounded-lg"
      />
      <ToolRenderer />
    </div>
  )
}Congrats! 🎉 Your CopilotKit & MCP server setup is ready!
Now we just need to add the endpoint URL to connect to an external MCP server. This is done inside the McpServerManager component by passing the URL using the endpoint property like this.
setMcpServers([
  {
    // Try a sample MCP server at https://mcp.composio.dev/
    endpoint: 'your_mcp_sse_url',
  },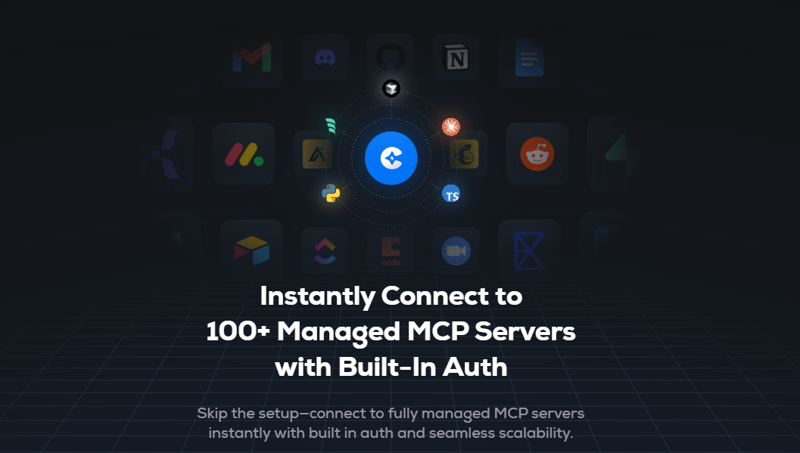
])There are two easier ways to instantly connect to 100+ MCP servers:
1) Composio - Composio has fully managed servers, which eliminates the need for complex setups and comes with built-in Auth. Supports over 250+ tools and provides 20,000+ pre-built API actions to integrate without coding.
It can also operate locally or remotely. And provides better tool-calling accuracy which allows AI agents to interact smoothly with integrated apps.
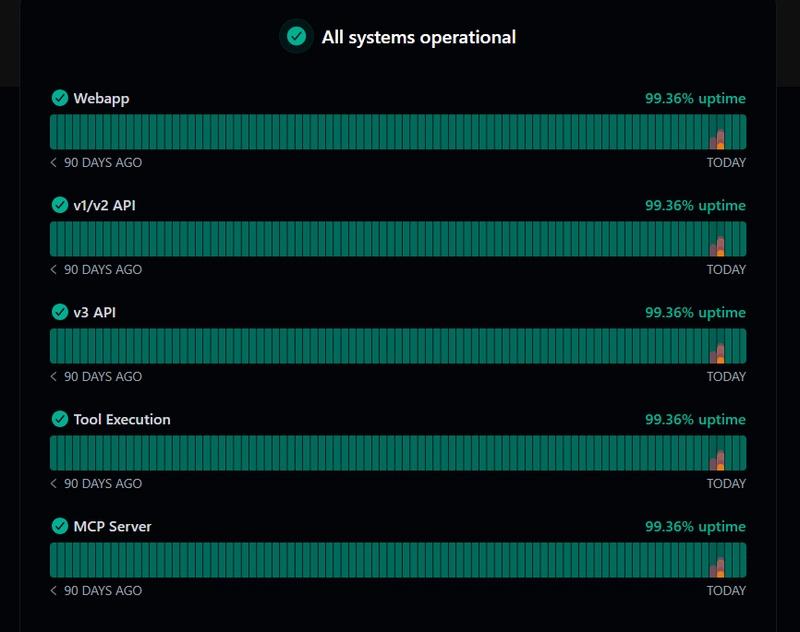
It also means less downtime and fewer maintenance problems. You can check the status at status.composio.dev/.
With each of the options, you will find the total active users, its current version, how recently it was updated, and all the available actions.
You will find instructions to install it using TypeScript, Python, and it supports Claude (MacOS), Windsurf (MacOS), and Cursor as MCP hosts.
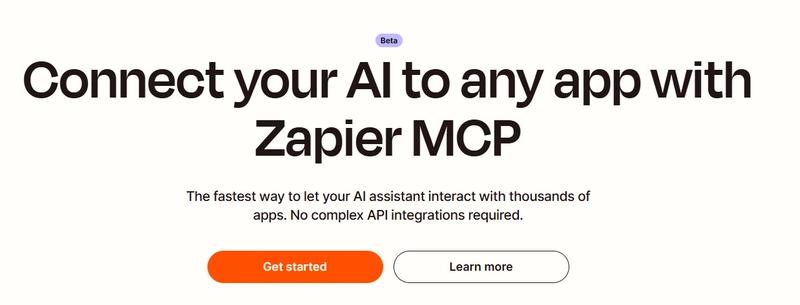
2) Zapier - Zapier supports over 8,000 apps, but you can only make 80 tool calls per hour, which can be a limitation.
In case there are server issues, just use the other option.
🔧 Troubleshooting MCP servers
The easiest way to do that is to use clients like Cursor or Claude (where you just need to run an npx command in Cursor), and then you can test tool invocation by opening the chat.
If you're unsure whether your MCP server works:
⚡ Open the MCP server URL directly in your browser. If it returns a stream of data (usually JSON lines), it's working.
⚡ Check your browser’s DevTools for network or console errors.
⚡ Sometimes stale connections can cause silent failures, and restarting your dev server can solve this issue.
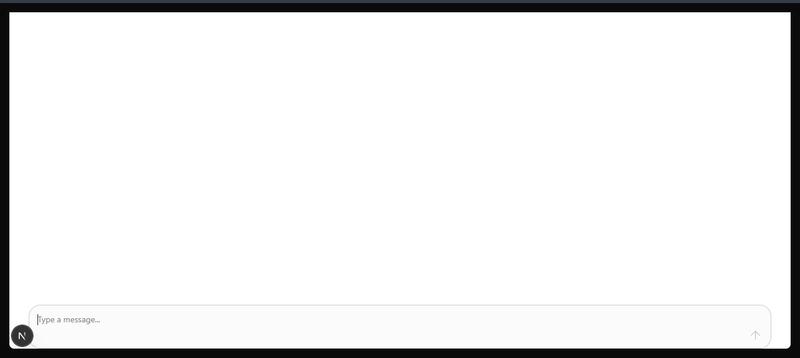
You can run the server in the next.js app by using npm run dev. You should now see the chat interface.
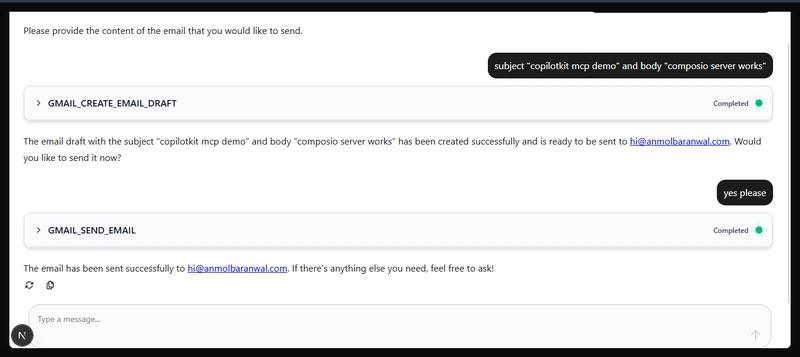
The flow is very similar to the last one. I'm again using the Gmail server at https://mcp.composio.dev/gmail to help you understand the difference in results between setting up from scratch and doing it from the CLI.
After adding the endpoint, just provide the prompt, and you will be able to see the tool call since we used the ToolRenderer component.

Like before, it will ask for approval and send the email accordingly. I've verified that the email was successfully delivered to my inbox.
In the next section, we are going to take a complex example.
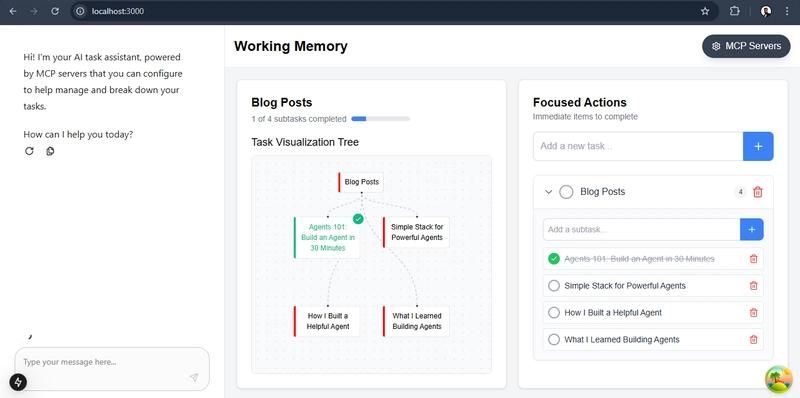
Let's study a working memory project that will teach us how to build interactive, AI-powered chat applications that connect with external tools like Linear and Slack using MCP and CopilotKit.
Tech stack involved:
Before proceeding, please make sure you have Node.js (LTS version recommended).
For the sake of simplicity, we will clone the copilotkit mcp repository on GitHub.
git clone https://github.com/CopilotKit/copilotkit-mcp-demo.git
Please install the dependencies using npm install.
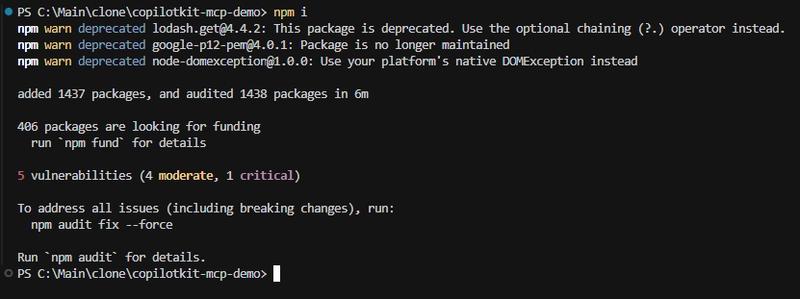
After that, we need to create a .env file under the root directory. Then add your OpenAI API key to the .env file. I've attached the docs link so it's easy to follow.
This will be the naming convention.
OPENAI_API_KEY= YOUR_API_KEY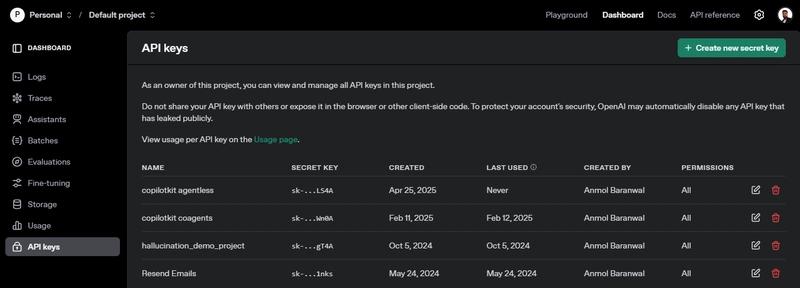
openai api key
You also need to place the API key from cloud.copilotkit.ai in the .env file. It's free and recommended if you're building for production.
This will be the naming convention.
NEXT_PUBLIC_COPILOT_CLOUD_API_KEY= YOUR_API_KEYJust click on Get Started, and you will find a public API key.
This is what the project structure looks like.
/src/app : Contains Next.js pages, layouts, and global styles./src/components : Includes reusable UI components and agent interfaces like Travel, Research, Chat, Map, and Sidebar./src/providers : Wraps global state providers for managing agent states./src/lib : Contains utility functions and configuration files./src/hooks : Custom React hooks for reusable logic./src/contexts : Provides React context for managing global state.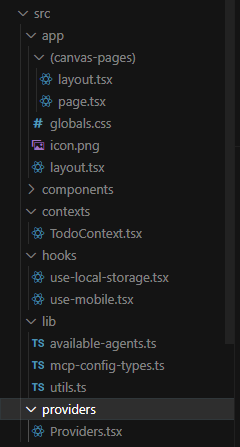
I won't cover the code of every component otherwise, this blog will be too long, so I will try to cover as much as possible with the concepts involved. Please check the repo and follow along to see how everything works together.
⚡ 1. The Entry is src/app/layout.tsx, which imports global styles, loads Google fonts, and then wraps everything in your top-level <Providers>.
⚡ 2. Providers (src/providers/Providers.tsx) is the component that sets up the global providers for the state, API access, and server configuration for the app.
"use client";

import { CoAgentsProvider } from "@/components/coagents-provider";
import McpServerManager from "@/components/McpServerManager";
import { ToolRenderer } from "@/components/ToolRenderer";
import { useLocalStorage } from "@/hooks/use-local-storage";
import { CopilotKit } from "@copilotkit/react-core";
import { QueryClient, QueryClientProvider } from "@tanstack/react-query";
import { ReactQueryDevtools } from "@tanstack/react-query-devtools";
import React from "react";

export interface Config {
  endpoint: string;
  serverName: string;
}

export interface ConfigContextType {
  config: Config[];
  setConfig: (config: Config[]) => void;
}

const queryClient = new QueryClient();
export const ServerConfigsContext = React.createContext<
  ConfigContextType | undefined
>(undefined);
export default function Providers({ children }: { children: React.ReactNode }) {
  const [mcpConfig] = useLocalStorage("mcpConfig", []);
  const [config, setConfig] = React.useState<Config[]>(mcpConfig || []);

  return (
    <ServerConfigsContext.Provider value={{ config, setConfig }}>
      <QueryClientProvider client={queryClient}>
        <CopilotKit
          publicApiKey={process.env.NEXT_PUBLIC_COPILOT_CLOUD_API_KEY}
        >
          <McpServerManager configs={config} />
          <ToolRenderer />
          {/* <MCPToolCall /> */}
          <CoAgentsProvider>{children}</CoAgentsProvider>
        </CopilotKit>
        <ReactQueryDevtools initialIsOpen={false} />
      </QueryClientProvider>
    </ServerConfigsContext.Provider>
  );
}
ServerConfigsContext : holds your list of configured “MCP” serversQueryClientProvider : wires up React Query<CopilotKit> : initializes the CopilotKit runtime (using your public API key)<McpServerManager> : reads configs from context and tells CopilotKit which servers to use<ToolRenderer> : catches all CopilotKit “tool calls” and renders them as MCPToolCall cards<CoAgentsProvider> : placeholder for collating agent state (currently just passes through children)⚡ 3. MCP Server Configuration
src/components/mcp-config-modal.tsx) : a modal that lets you add/remove SSE or stdio servers, persists to localStorage, updates context & CopilotKit.src\hooks\use-local-storage.tsx) : a hook that persists these settingsI'm not including the code because it's very long.
⚡ 4. Chat UI
src/components/chat-window.tsx) is just a styled wrapper around @copilotkit/react-ui’s <CopilotChat>"use client";
import { useTodo } from "@/contexts/TodoContext";
import { CopilotChat } from "@copilotkit/react-ui";
import "@copilotkit/react-ui/styles.css";
import { Loader2, RotateCw, SendIcon, Square } from "lucide-react";
import { FC } from "react";
import { Loader } from "./Loader";
export const ChatWindow: FC = () => {
const { todos } = useTodo();
return (
<CopilotChat
className="h-full flex flex-col"
instructions={`Always use the MCP server to complete the task. You will be provided with a list of MCP servers. Use the appropriate MCP server to complete the task.
To perform any actions over the todo task use the following data for manipulation ${JSON.stringify(
todos
)}`}
labels={{
title: "To-do Assistant",
initial:
"Hi! I'm your AI task assistant, powered by MCP servers that you can configure to help manage and break down your tasks. \n\nHow can I help you today?",
placeholder: "Type your message here...",
regenerateResponse: "Try another response",
}}
icons={{
sendIcon: (
<SendIcon className="w-4 h-4 hover:scale-110 transition-transform" />
),
activityIcon: (
<Loader
texts={[
"Thinking...",
"Analyzing Your Query...",
"Taking Action...",
]}
/>
),
spinnerIcon: <Loader2 className="w-4 h-4 animate-spin" />,
stopIcon: (
<Square className="w-4 h-4 hover:text-red-500 transition-colors" />
),
regenerateIcon: (
<RotateCw className="w-4 h-4 hover:rotate-180 transition-transform duration-300" />
),
}}
/>
);
};⚡ 5. Todo State & Actions
src/contexts/TodoContext.tsx) holds your in-memory list of todos & subtasks + all the CRUD/toggle functionssrc/components/Todo.tsx) renders the UI for adding/toggling/deleting tasks and subtasksWhen the AI decides to call one of those actions, CopilotKit will invoke your handlers, which update the same React context.
⚡ 6. Visual Representation
src/components/VisualRepresentation.tsx)ul id="">li id="">Subscribes to the same todo contextsrc/components/Nodes.tsx)⚡ 7. Tool Calls
src/components/ToolRenderer.tsx) installs a wildcard useCopilotAction listenersrc/components/MCPToolCall.tsx) showing status, errors/results, etc.⚡ 8. Canvas Layout
src/components/canvas.tsx) stitches it all together:ul id="">li id="">Left pane: ChatWindow⚡ 9. UI Primitives & Utilities
Here is the flow of all of the components.
1) You configure one or more MCP servers via the modal → they are saved in localStorage → then passed into CopilotKit through McpServerManager.
2) You type a message in the chat → CopilotKit routes it to the AI → the AI can “call” your registered actions (like ADD_TASK) through the MCP servers.
3) Then ToolRenderer visualizes each tool call → your action handlers update state in React context → both TodoApp and VisualRepresentation re-render with the new state → your chat stream continues.
I'm confident that if you open the codebase and learn about the flow, everything will make sense.
You can run the server locally using npm run dev and check the live demo app at copilotkit-mcp-demo.vercel.app.
Once you're comfortable with the basics, here are some advanced and creative ways you can use CopilotKit with MCP to build agentless, powerful workflows.
We can use chain tool interactions using MCP’s composable server endpoints.
Let's suppose an example task: Fetch unresolved Linear issues, summarize them and send a report to the team via Slack.
The technical flow could be:
MCP Server 1 (Linear): GET issues in Linear using the Linear_get_linear_issue action.
Local LLM (such as OpenAI): summarize the issue titles & descriptions using any API.MCP Server 2 (Slack): Use the slack_message action to post a summary in the defined channel.
You can define multi-step workflows via prompts, tools, and MCP servers.
We can build a simple code review assistant with custom logic.
Let's suppose an example task: Review this PR using our frontend checklist and comment inline on unoptimized code.
The technical flow could be:
GitHub MCP Server: fetches PR diff or file list.Prompt Templates: Load checklist rules as structured prompts.LLM (such as OpenAI): Run semantic analysis and generate inline feedback.GitHub MCP: using an appropriate action like post_comment_on_pull_request to leave remarks.
We can build assistants that respond based on past threads and conversation history.
Let's suppose an example task: Find all unanswered emails from investors and suggest follow-ups based on the last threads.
The technical flow could be:
Gmail MCP: GET a list of threads from Gmail using gmail_list_threads.LLM + Context Chunking: Summarize recent threads using OpenAI function calls.Draft Reply: Generate responses via LLM.Gmail MCP: Use gmail_send_email to send the draft.
You can extend this with Notion or Airtable MCPs to log interactions or add reminders like: Remind me next week if no reply.
These are just starting points. MCP lets you automate almost any multi-tool workflow, entirely through prompts (as logic).
Many developers assumed that integrating MCP was too early or too complex. Hopefully, CopilotKit’s built-in support proves otherwise.
So go build something wild. Make it useful. And let the world see what's possible when workflows meet context.
Have a great day! Until next time :)
You can checkmy work at anmolbaranwal.com.Thank you for reading! 🥰
Follow CopilotKit on Twitter and say hi, and if you'd like to build something cool, join the Discord community.
Subscribe to our blog and get updates on CopilotKit in your inbox.
