
Get early access
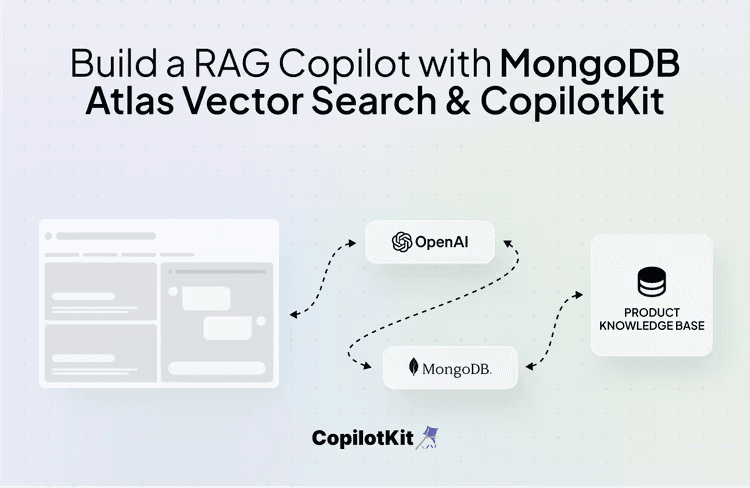
In this guide, you will learn how to build a RAG(Retrieval-Augmented Generation)-powered e-commerce platform using LangGraph, MongoDB Vector Search, and CopilotKit. The e-commerce platform helps users find products and get tailored product recommendations using LLMs.
Before we jump in, here is what we will cover:
Here’s a preview of the application we’ll be building.
Imagine you’re using a language model (like ChatGPT) to answer questions. These models are trained on massive datasets and can generate human-like text, but they have limitations:
That is where RAG comes in.
It solves these problems by giving the model access to external information (like a database, documents, or web pages).
Instead of the AI guessing answers based on what it remembers, it can look for the right information and then explain it in a way that makes sense.
You can learn more about Retrieval-Augmented Generation (RAG) here.
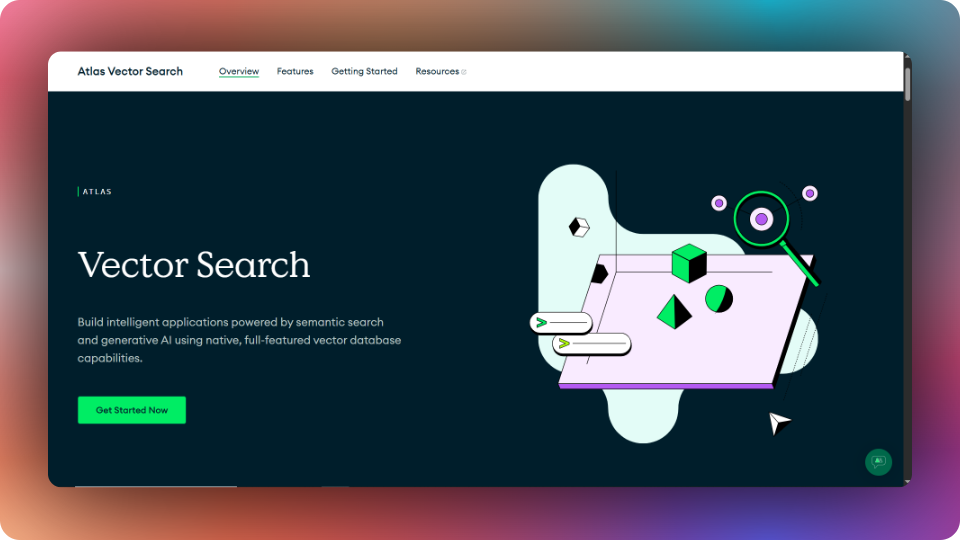
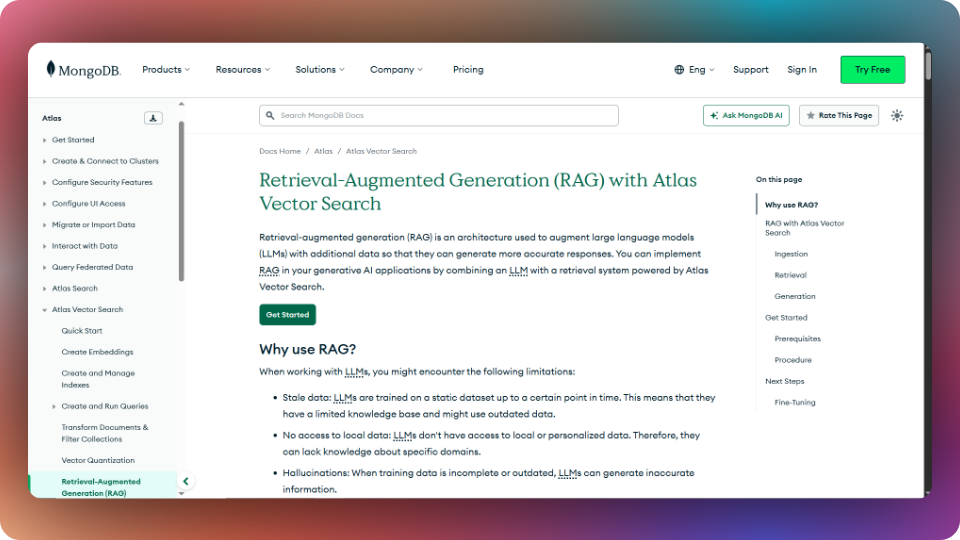
MongoDB Atlas Vector Search is a platform used to create vector indexes and perform vector searches, including approximate nearest neighbor (ANN) and exact nearest neighbor (ENN) searches, on vector embeddings representing data such as text, images, or audio.
This enables applications to retrieve results based on contextual similarity rather than exact keyword matches, making it useful for AI-driven applications like recommendation systems, chatbots, and image recognition.
Here is what makes MongoDB Atlas Vector Search stand out from the rest:
You can learn more about MongoDB Atlas Vector Search here.
To fully understand this tutorial, you need to have a basic understanding of React or Next.js.
We'll also make use of the following:
In this section, you will learn how to build and run a RAG-powered e-commerce AI agent using LangGraph, MongoDB Atlas Vector Search, and OpenAI LLMs.
After that, you will learn how to deploy the e-commerce AI agent to a cloud application platform known as Render.
Before we get started, let us talk about how RAG is implemented using MongoDB Atlas Vector Search.
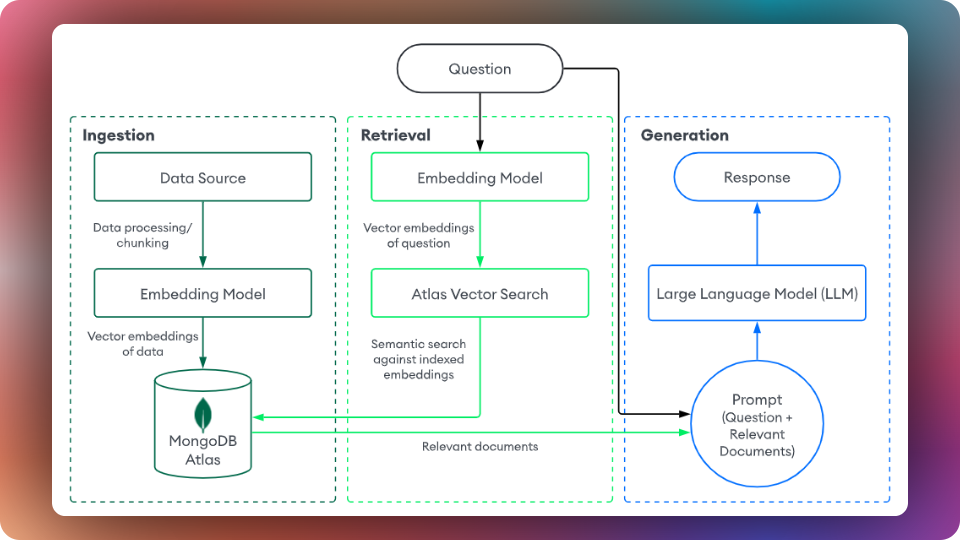
First, you store your custom data as vector embeddings in a vector database such as MongoDB Atlas.
Then retrieve semantically similar data based on the user’s query using a search solution such as MongoDB Atlas Vector Search.
Finally, feed your LLM with the retrieved data as context to generate a more accurate and relevant response, reducing hallucinations.
Here is a diagram that explains RAG implementation using MongoDB better.
You can also learn more about implementing RAG with Atlas Vector Search on MongoDB docs.
Now that you have a clear idea of how RAG is implemented using MongoDB, let us jump into building the RAG-powered e-commerce AI agent.
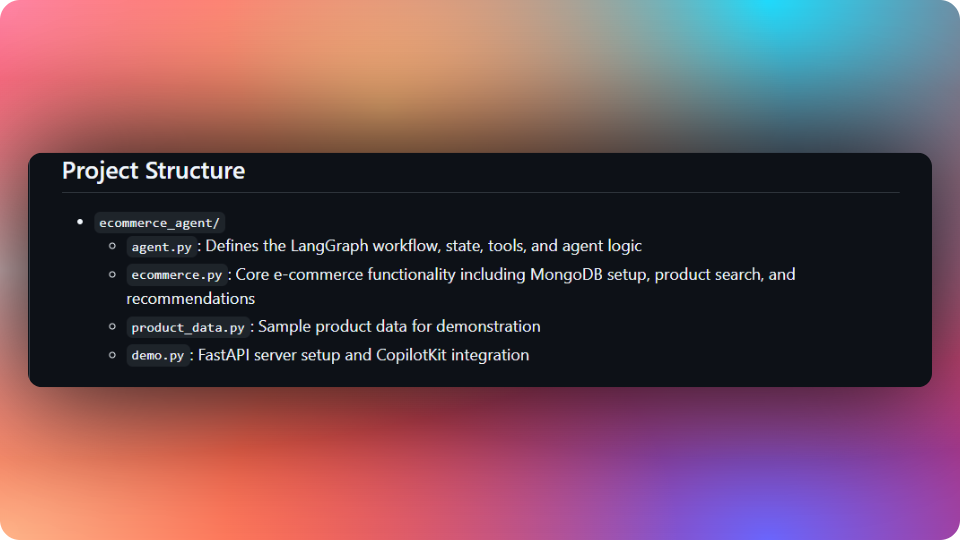
First, start by cloning the ecommerce-rag-agent repository, which contains code for a Python-based LangGraph agent:
git clone <https://github.com/TheGreatBonnie/ecommerce-rag-agent.git>The repository contains a RAG-powered e-commerce AI agent with the following structure:
Next, create a .env file in the ecommerce-rag-agent folder. Then add OpenAI, LangSmith, and MongoDB Atlas credentials into the environment variables
OPENAI_API_KEY=your_openai_api_key
LANGSMITH_API_KEY=your_langsmith_api_key
MONGODB_USERNAME=your_mongodb_username
MONGODB_PASSWORD=your_mongodb_password
MONGODB_CLUSTER=your_cluster_address
MONGODB_OPTIONS=retryWrites=true&w=majority&appName=Cluster0
EMBEDDING_MODEL=text-embedding-3-small
PYTHON_VERSION="3.12.2"
PORT="8000"Then install all packages and dependencies using Poetry.
poetry installOnce all packages and dependencies have been installed, let us now see how to run the RAG-powered e-commerce AI agent.
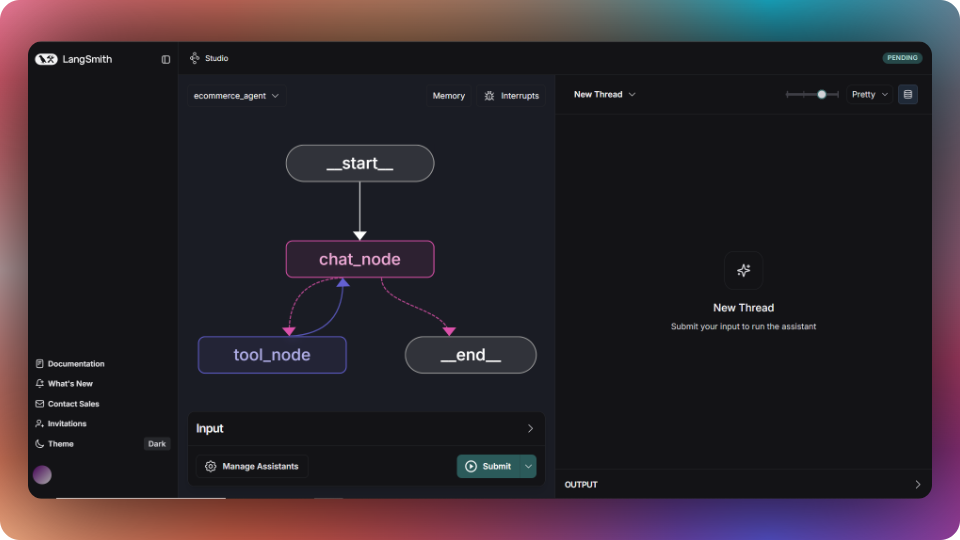
To run the e-commerce AI agent, execute the following command in the command line.
poetry run langgraph devOnce the AI agent has started, it will open in the browser on the LangGraph studio, and you can visualize it, as shown below.
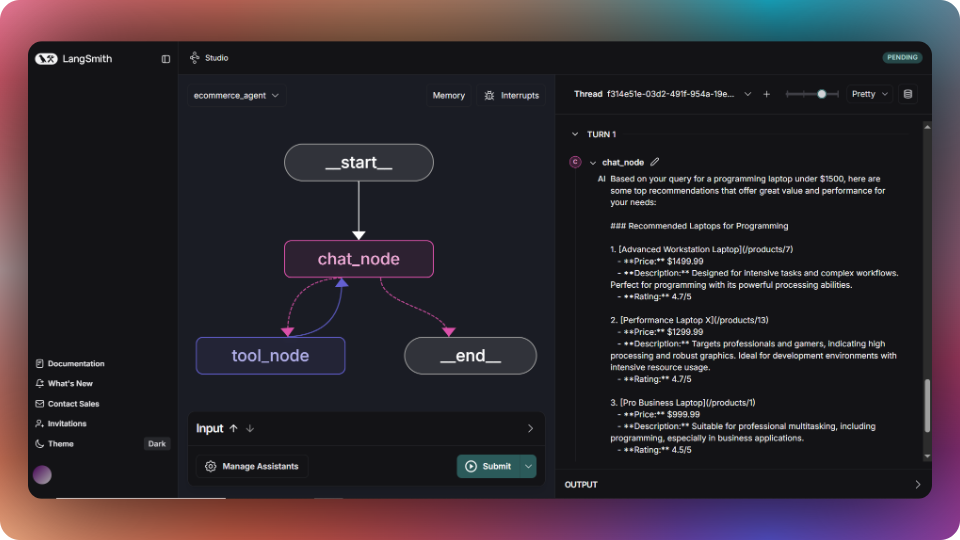
To test the e-commerce AI agent, add the “Find me a good laptop for programming under $1500” query to the messages state variable and click the Submit button.

The e-commerce AI agent will start searching for programming laptops under $1500. Once done, the agent will provide tailored recommendations, as shown below.
Now that you have learned how to run and test the e-commerce AI agent, let us see how to deploy it.
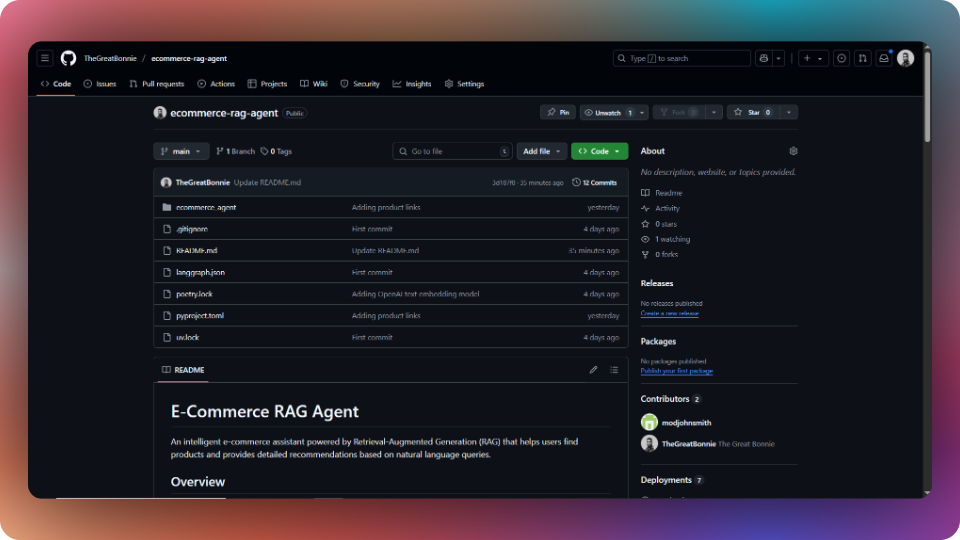
To deploy the e-commerce AI agent, push the AI agent code to a GitHub repository, as shown below.
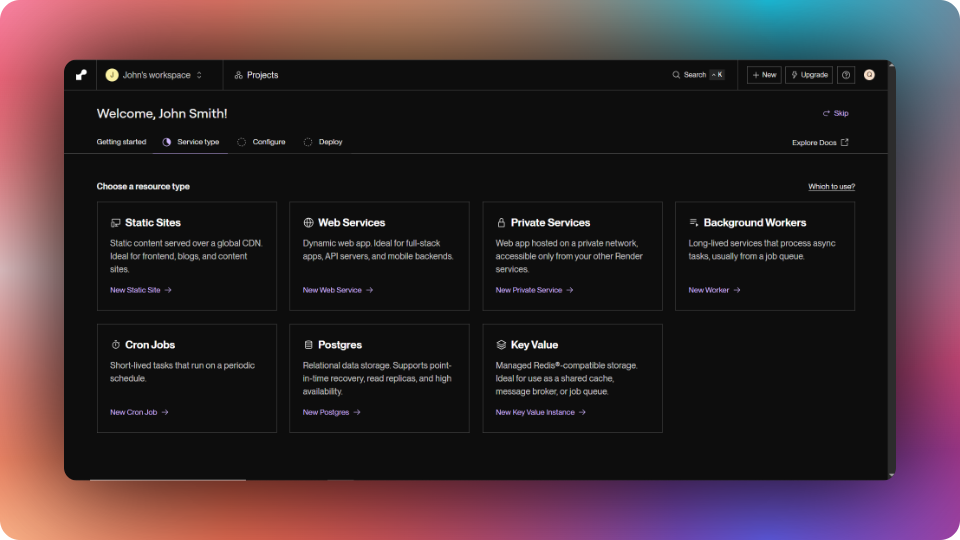
After that, sign up to Render.com and select Web Services as your resource type on your Render dashboard.
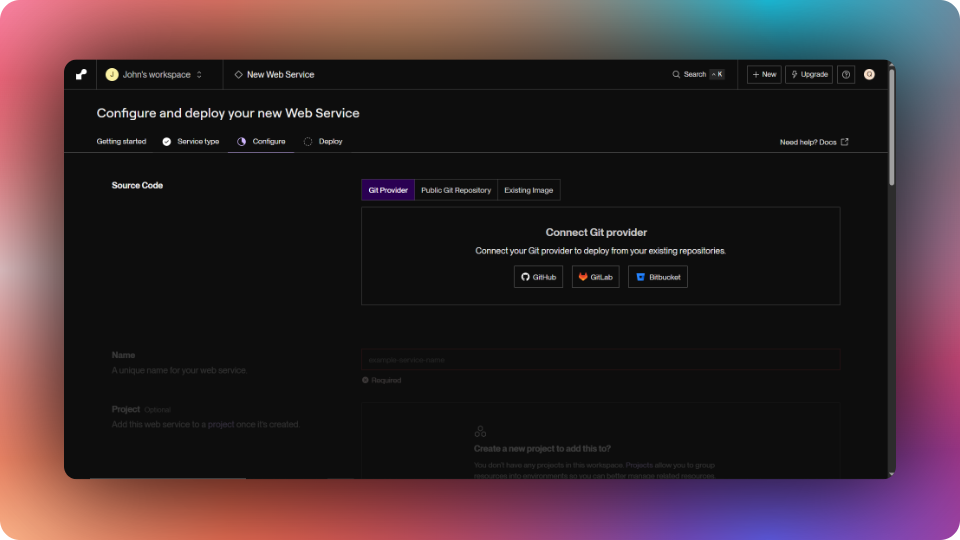
Then connect GitHub as your Git provider to deploy the e-commerce AI agent repository.
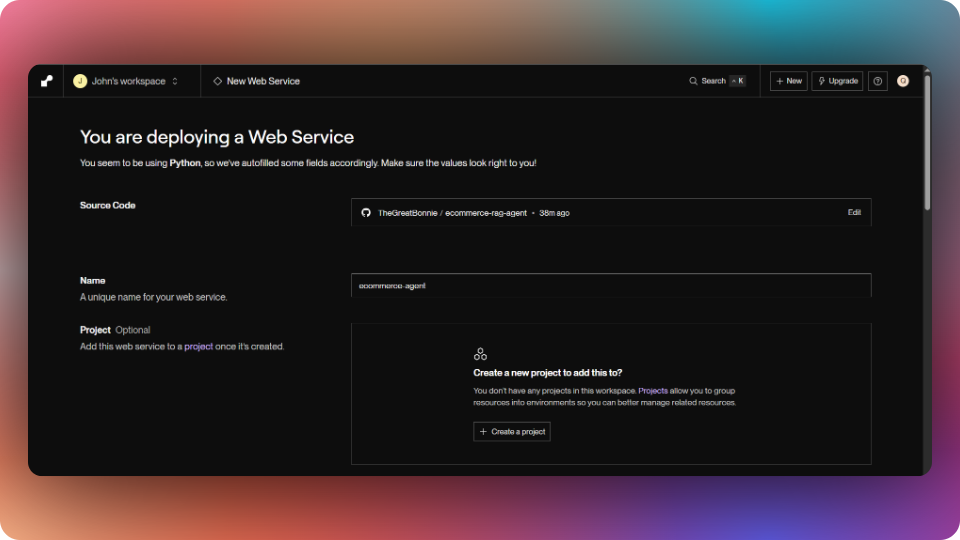
Next, select the e-commerce AI agent repository and add a unique name for the web service, as shown below.
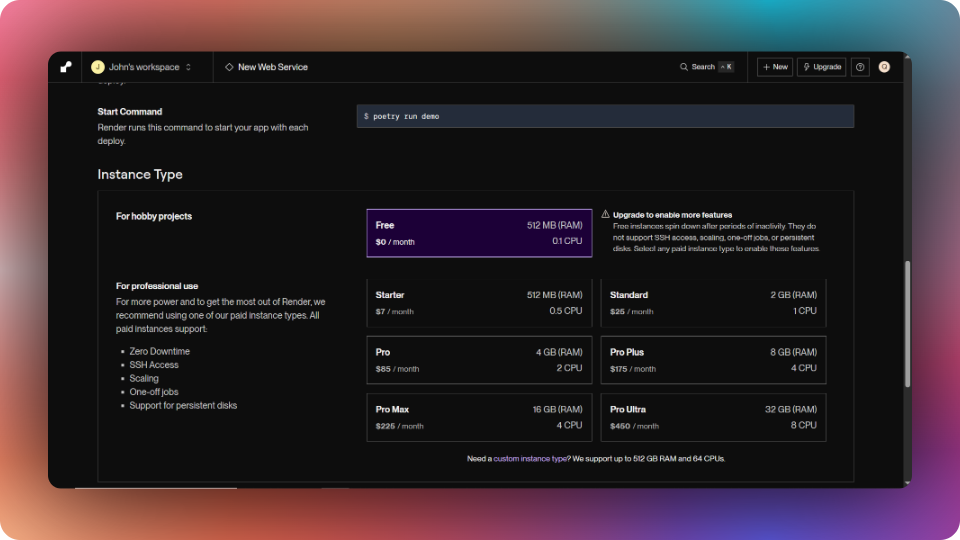
Then scroll down to add “poetry run demo” as the start command and select the instance type, as shown below.
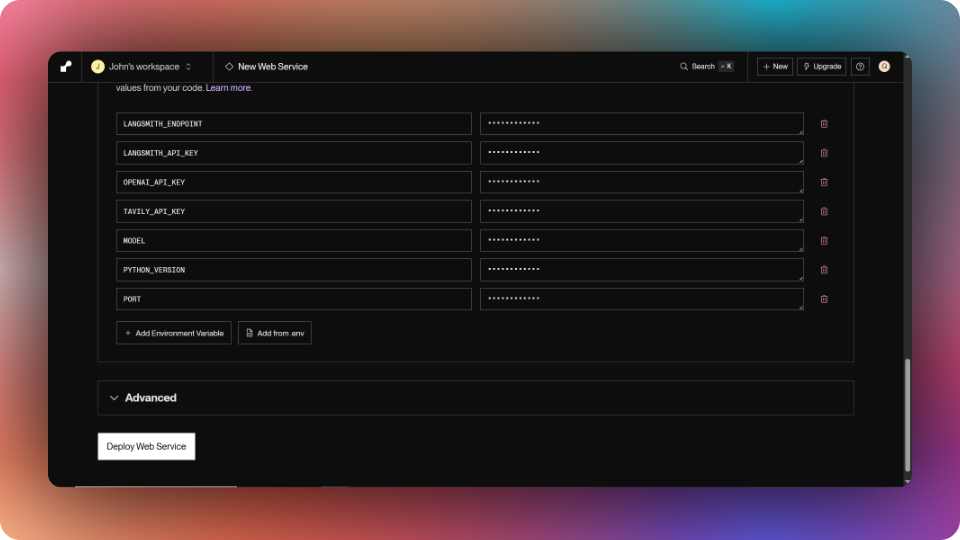
Finally, add all the environment variables you added in the .env file, and click the Deploy Web Service button, as shown below.
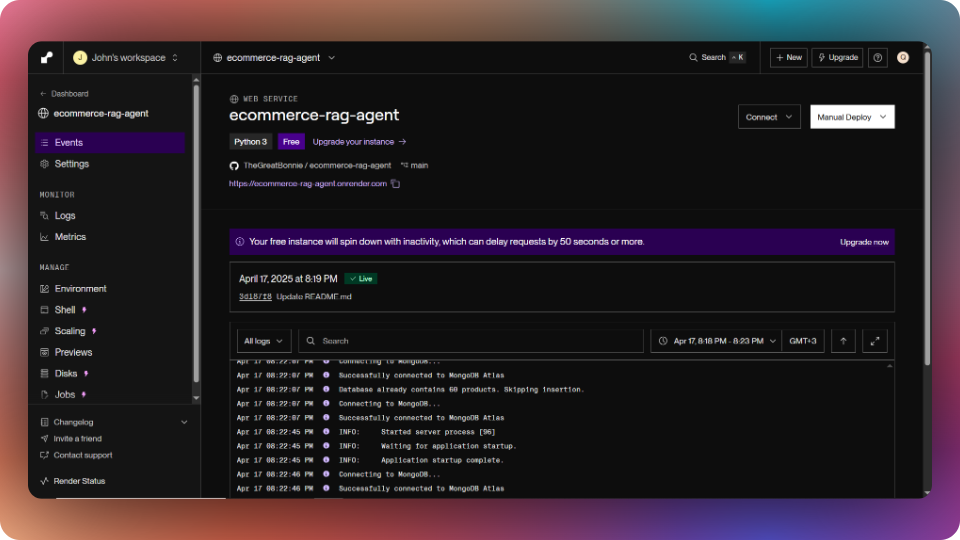
Once the AI agent has been deployed, grab its URL. The URL will be used to register the e-commerce agent with Copilot Cloud.
Now that we have learned how to build, run, and deploy the e-commerce AI agent, let’s see how we can add a frontend UI to chat with it.
In this section, you will learn how to build a frontend UI to query the RAG-powered e-commerce AI agent using Copilot Cloud and CopilotKit.
Let’s get started.
To register the RAG-powered e-commerce AI agent, go to Copilot Cloud, sign in, and click the Get Started button.

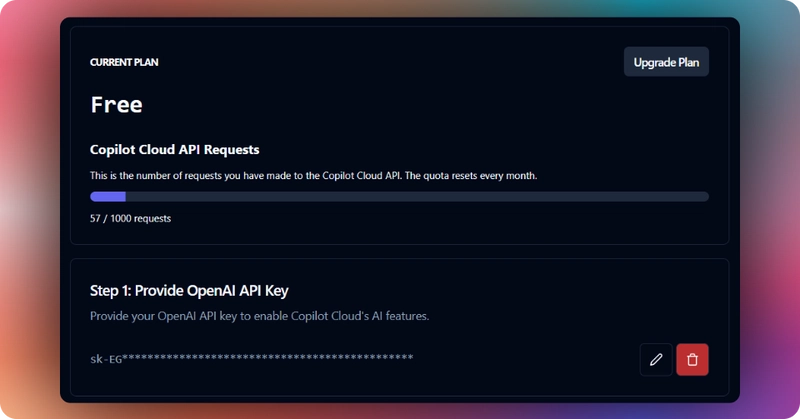
Then add your OpenAI API key to the "Provide OpenAI API Key" section, as shown below.
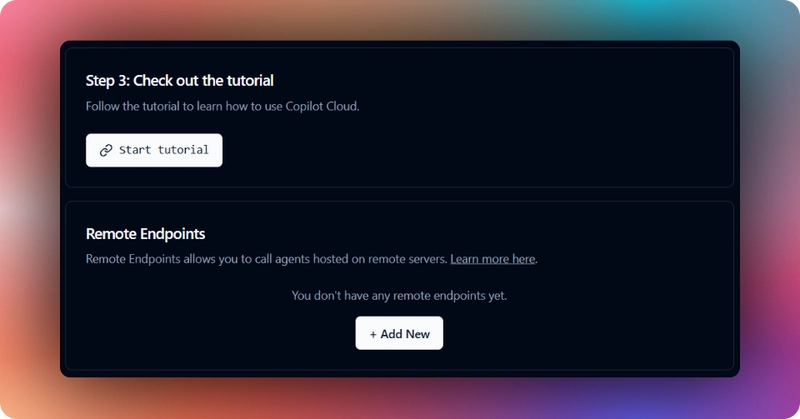
Next, scroll down to the remote endpoints section and click the Add New button.
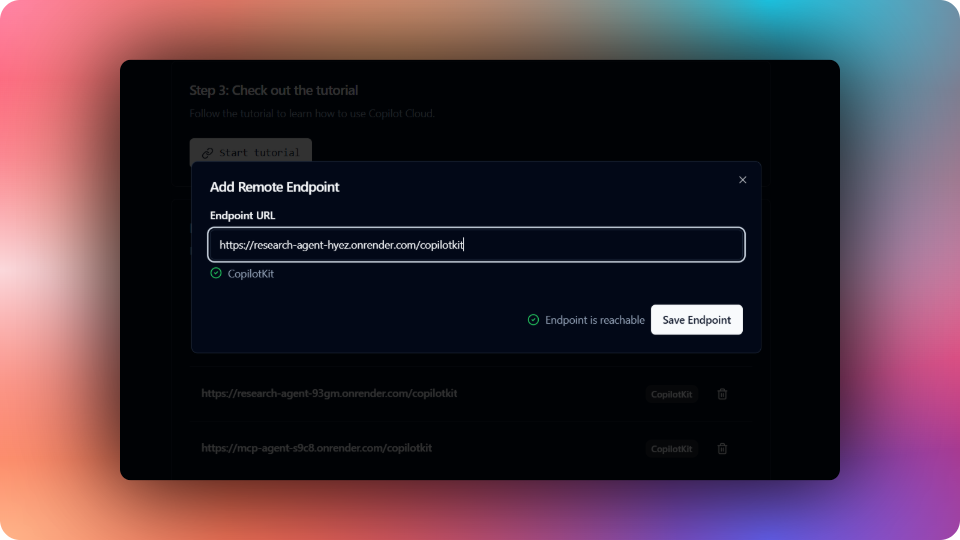
Then select the remote endpoint from the modal that pops up. After that, add your AI agent endpoint URL from Render.com and click the Save Endpoint button, as shown below.
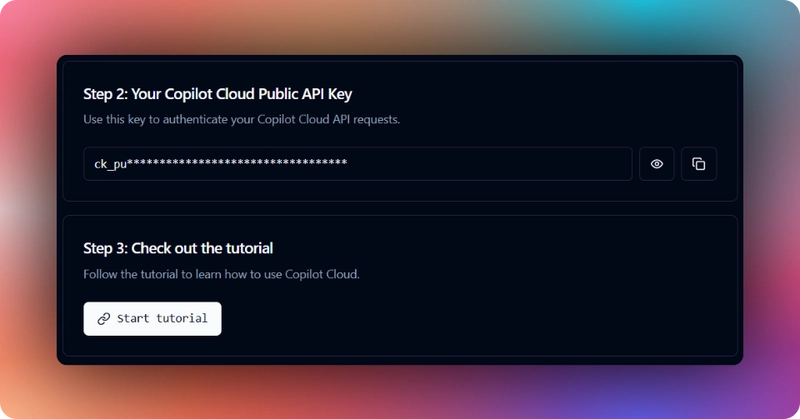
Once the AI agent endpoint is saved, copy the Copilot Cloud Public API Key, as shown below.
To build the e-commerce AI agent UI, start by cloning the e-commerce AI agent UI repository, which contains code for a Next.js project:
git clone <https://github.com/TheGreatBonnie/ecommerce-ui.git>Next, create a .env file in the root directory. Then add your Copilot Cloud Public API Key into the environment variables.
NEXT_PUBLIC_CPK_PUBLIC_API_KEY=your-copilot-cloud-api-keyAfter that, install the frontend dependencies using pnpm.
pnpm installThen start the app using the command below.
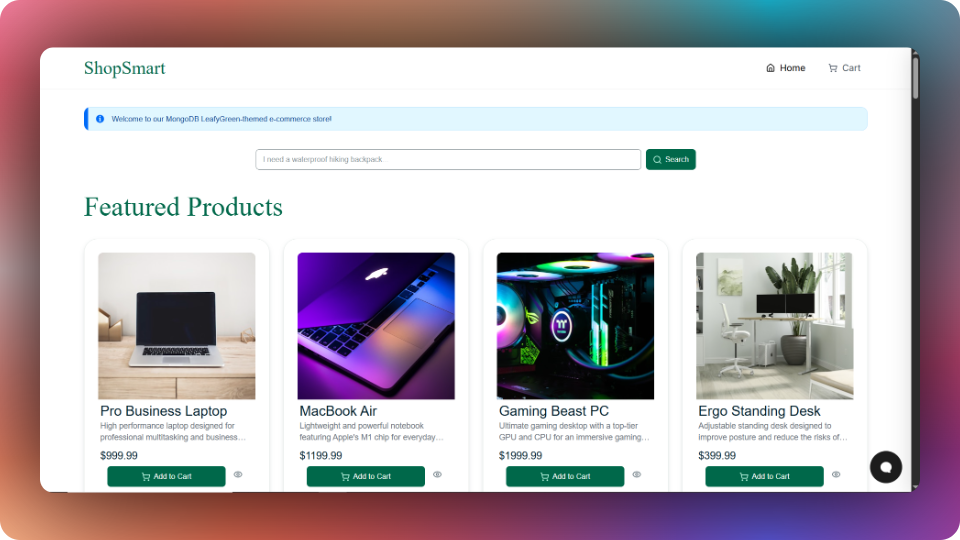
pnpm run devNavigate to http://localhost:3000/ and you should see the e-commerce AI agent frontend up and running.
Let’s now see how to build the frontend UI for the e-commerce AI agent using CopilotKit.
To set up the CopilotKit Provider, the <CopilotKit> component should wrap the Copilot-aware parts of your application. For most use cases, it's appropriate to wrap the CopilotKit provider around the entire app, e.g., in your layout.tsx, as shown below in the app/layout.tsx file
import type React from "react";
import { ReactNode } from "react";
import type { Metadata } from "next";
import { Inter } from "next/font/google";
import "./globals.css";
import Navigation from "@/components/navigation";
import { ThemeProvider } from "@/components/theme-provider";
import { Toaster } from "@/components/ui/toaster";
import { CartProvider } from "@/context/cart-context";
import { CopilotKit } from "@copilotkit/react-core";
import "@copilotkit/react-ui/styles.css";
const inter = Inter({ subsets: ["latin"] });
//...
export default function RootLayout({ children }: { children: ReactNode }) {
  return (
    <html lang="en">
      <body className={inter.className}>
        {/* CopilotKit wrapper provides AI capabilities throughout the app */}
        <CopilotKit
          publicApiKey={process.env.NEXT_PUBLIC_CPK_PUBLIC_API_KEY}
          agent="ecommerce_agent"
        >
          {/* ThemeProvider manages light/dark mode for the application */}
          <ThemeProvider
            attribute="class"
            defaultTheme="light"
            enableSystem
            disableTransitionOnChange
          >
            {/* CartProvider manages the shopping cart state globally */}
            <CartProvider>
              {/* Main navigation bar component */} <Navigation />
              {/* Main content area with minimum height calculation to ensure footer positioning */}
              <div className="min-h-[calc(100vh-73px)]">{children}</div>
              {/* Toast notifications component for displaying messages */}
              <Toaster />
            </CartProvider>
          </ThemeProvider>
        </CopilotKit>
      </body>
    </html>
  );
}To set up your Copilot UI, first import the default styles in your root component (typically layout.tsx).
import "@copilotkit/react-ui/styles.css";Copilot UI ships with a number of built-in UI patterns; choose whichever one you like from CopilotPopup, CopilotSidebar, CopilotChat, to Headless UI.
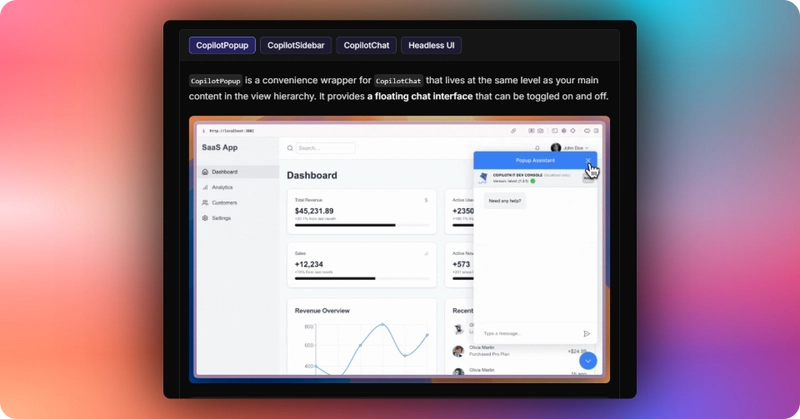
In this case, we will use Copilot Sidebar as shown in the app/page.tsx file.
"use client";
import ProductGrid from "@/components/product-grid";
import SearchBar from "@/components/search-bar";
import { products } from "@/lib/mock-data";
import { CopilotSidebar } from "@copilotkit/react-ui";
import { Progress } from "@/components/Progress";
export default function Home() {
return (
<CopilotSidebar
defaultOpen={false}
instructions={
"You are assisting the user as best as you can. Answer in the best way possible given the data you have."
}
onSubmitMessage={async (message) => {
// clear the logs before starting the new research
setState({ ...state, logs: [] });
await new Promise((resolve) => setTimeout(resolve, 30));
}}
labels={{
title: "Sidebar Assistant",
initial: "How can I help you today?",
}}
>
<main className="container mx-auto px-4 py-8">
{" "}
<div className="mb-8">
<SearchBar />{" "}
</div>
<h1 className="text-3xl font-bold mb-6">Featured Products</h1>{" "}
<ProductGrid products={products} />{" "}
</main>{" "}
</CopilotSidebar>
);
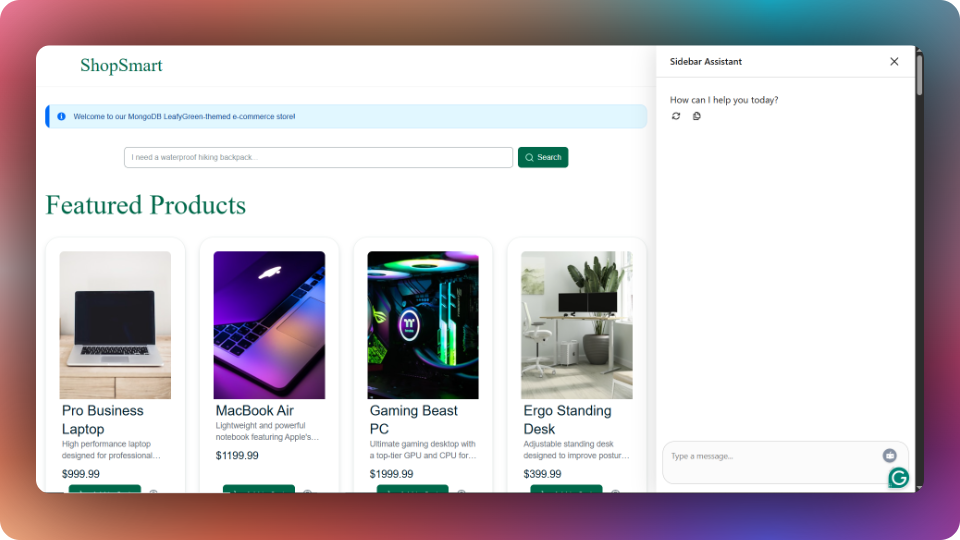
}The sidebar is then rendered on the frontend UI, as shown below.
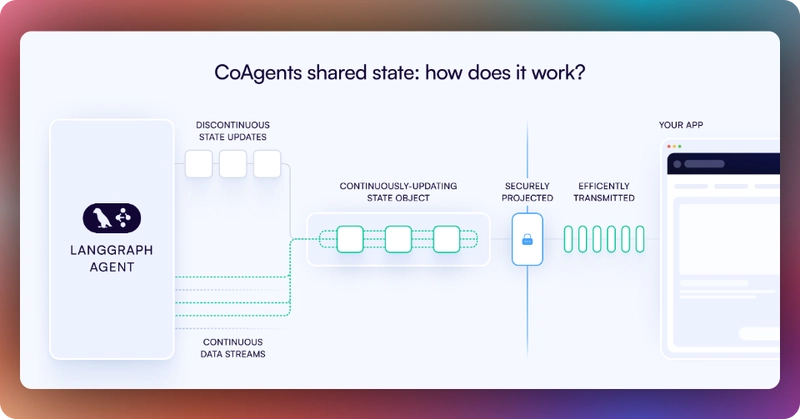
In CopilotKit, AI agents maintain a shared state that seamlessly connects your UI with the agent's execution. This shared state system allows you to:
You can learn more about CoAgents’ shared state on CopilotKit docs.
To create a shared state between the frontend UI and the RAG-powered e-commerce AI agent, first, you need to define the agent state and emit it to the front end, as shown in the ecommerce_agent/agent.py file.
class ToolNode:
    """Node for executing tools in a workflow graph."""
    def __init__(self, tools):
        self.tools = tools
    async def __call__(self, state, config):
        # Initialize or retrieve logs list
        state["logs"] = state.get("logs", [])

        # Update processing status
        state["processing_status"] = "processing"

        # Initialize additional state properties for tracking
        state["current_query"] = AgentState.current_query
        state["search_stage"] = AgentState.search_stage
        state["progress_percentage"] = AgentState.progress_percentage
        state["active_filters"] = AgentState.active_filters
        state["matched_products_count"] = AgentState.matched_products_count
        state["filtered_products_count"] = AgentState.filtered_products_count
        state["processing_time"] = AgentState.processing_time
        state["search_history"] = AgentState.search_history
        state["error_message"] = AgentState.error_message

        # Initial state emission to show we're starting
        await copilotkit_emit_state(config, state)

        # Get the tool call from the last message if it exists
        last_message = state["messages"][-1]
        if not isinstance(last_message, AIMessage) or "tool_calls" not in last_message.additional_kwargs:
            return state
        tool_calls = last_message.additional_kwargs["tool_calls"]

        # Execute each tool call
        for tool_call in tool_calls:
            tool_name = tool_call["function"]["name"]
            tool_args = json.loads(tool_call["function"]["arguments"])
            tool_call_id = tool_call["id"]

            # Add a log entry for this tool call
            log_entry = {
                "message": f"Processing {tool_name} with query: {tool_args.get('query', '')}",
                "done": False
            }
            state["logs"].append(log_entry)

            # Emit state to update frontend about the tool execution starting
            await copilotkit_emit_state(config, state)

            # Find and execute the matching tool
            for i, tool in enumerate(self.tools):
                if tool.name == tool_name:
                    try:
                        # Pass arguments as the input parameter dictionary
                        result = await tool.ainvoke(input=tool_args["query"])

                        # Add a proper tool message with the tool_call_id
                        tool_message = ToolMessage(
                            content=str(result),
                            tool_call_id=tool_call_id
                        )
                        state["messages"].append(tool_message)

                        # Update state with the latest status from AgentState
                        state["current_query"] = AgentState.current_query
                        state["search_stage"] = AgentState.search_stage
                        state["progress_percentage"] = AgentState.progress_percentage
                        state["active_filters"] = AgentState.active_filters
                        state["matched_products_count"] = AgentState.matched_products_count
                        state["filtered_products_count"] = AgentState.filtered_products_count
                        state["processing_time"] = AgentState.processing_time
                        state["search_history"] = AgentState.search_history
                        state["error_message"] = AgentState.error_message
                        # Mark the log entry as complete
                        state["logs"][-1]["done"] = True
                        # Emit intermediate state after tool execution
                        await copilotkit_emit_state(config, state)
                        except Exception as e:
                            # Update log with error
                            state["logs"][-1]["message"] = f"Error in {tool_name}: {str(e)}"
                            state["logs"][-1]["done"] = True
                            # Update error state
                            state["error_message"] = f"Error in {tool_name}: {str(e)}"
                            state["search_stage"] = "error"
                            state["progress_percentage"] = 0
                            # Emit error state
                            await copilotkit_emit_state(config, state)
                            # Add error message to messages
                            error_message = ToolMessage(
                                content=f"Error executing {tool_name}: {str(e)}",
                                tool_call_id=tool_call_id
                            )
                            state["messages"].append(error_message)

                        break

            # Clear logs after processing is complete but keep other state data
            state["logs"] = []
            state["processing_status"] = "completed"

            # Final state emission
            await copilotkit_emit_state(config, state)

            return state
Then use the CopilotKit useCoAgent hook to share the RAG-powered e-commerce AI agent state with your frontend UI, as shown in the app/page.tsx file
"use client";
import ProductGrid from "@/components/product-grid";
import SearchBar from "@/components/search-bar";
import { products } from "@/lib/mock-data";
import { CopilotSidebar } from "@copilotkit/react-ui";
import { AgentState } from "@/lib/types";
import {
  useCoAgent,
  useCoAgentStateRender,
  useCopilotAction,
} from "@copilotkit/react-core";
import { Progress } from "@/components/Progress";
export default function Home() {
  /**
   * Initialize and manage the AI assistant agent state  * useCoAgent hook creates and manages state for the CopilotKit assistant
   * @property {string} name - Unique identifier for this agent instance
   * @property {AgentState} initialState - Initial values for all agent state properties
   * */
  const { state, setState } =
    useCoAgent <AgentState>{
      name: "ecommerce_agent",
      initialState: {
        logs: [],
        // Logs of agent actions for displaying progress
        processing_status: "idle",
        // Current processing status of the agent
        current_query: "",
        // The user's current search query
        search_stage: "",
        // Current stage of the search process
        progress_percentage: 0,
        // Progress indicator for current operation
        active_filters: {},
        // Applied filters for product search
        matched_products_count: 0,
        // Number of products matching the search criteria
        filtered_products_count: 0,
        // Number of products after applying filters
        processing_time: 0,
        // Time taken to process the request
        search_history: [],
        // History of previous searches
        error_message: "",
        // Error message if something goes wrong
      },
    };
  return (
    <CopilotSidebar
      defaultOpen={false}
      instructions={
        "You are assisting the user as best as you can. Answer in the best way possible given the data you have."
      }
      onSubmitMessage={async (message) => {
        // clear the logs before starting the new research
        setState({ ...state, logs: [] });
        await new Promise((resolve) => setTimeout(resolve, 30));
      }}
      labels={{
        title: "Sidebar Assistant",
        initial: "How can I help you today?",
      }}
    >
      {/*....*/}
    </CopilotSidebar>
  );
}
Next, render the agent's state in the sidebar UI. This is useful for informing the user about the agent's state in a more in-context way. To do this, you can use the useCoAgentStateRender hook, as shown in the app/page.tsx file.
"use client";
import ProductGrid from "@/components/product-grid";
import SearchBar from "@/components/search-bar";
import { products } from "@/lib/mock-data";
import { CopilotSidebar } from "@copilotkit/react-ui";
import { AgentState } from "@/lib/types";
import {
  useCoAgent,
  useCoAgentStateRender,
  useCopilotAction,
} from "@copilotkit/react-core";
import { Progress } from "@/components/Progress";
export default function Home() {
  /**
   * Configure how the agent state should be rendered in the UI
   * This callback determines when and how to show the Progress component
   *  @property {string} name - Must match the agent name from useCoAgent
   * @property {Function} render - Callback that returns JSX based on agent state
   */
  useCoAgentStateRender({
    name: "ecommerce_agent",
    render: ({ state, nodeName, status }) => {
      // Only show progress if there are logs or progress has started
      if (
        !state.logs ||
        (state.logs.length === 0 && state.progress_percentage === 0)
      ) {
        return null;
      }
      return <Progress logs={state.logs} state={state} />;
    },
  });
  return (
    <CopilotSidebar
      defaultOpen={false}
      instructions={
        "You are assisting the user as best as you can. Answer in the best way possible given the data you have."
      }
      onSubmitMessage={async (message) => {
        // clear the logs before starting the new research
        setState({ ...state, logs: [] });
        await new Promise((resolve) => setTimeout(resolve, 30));
      }}
      labels={{
        title: "Sidebar Assistant",
        initial: "How can I help you today?",
      }}
    >
      {/*...*/}
    </CopilotSidebar>
  );
}
Then navigate to http://localhost:3000/, add “Find me a good laptop for programming under $1500” to the sidebar chat, and press “Enter.” You should see the RAG-powered e-commerce AI agent state rendered in the chat UI and tailored product recommendations, as shown below.
Congratulations! You have successfully built a RAG-powered e-commerce platform using LangGraph, MongoDB Vector Search, and CopilotKit.
In this guide, we have walked through the steps of building a RAG-powered e-commerce platform using LangGraph, MongoDB Atlas Vector Search, and CopilotKit.
While we’ve explored a couple of features, we have barely scratched the surface of the countless use cases for CopilotKit, ranging from building interactive AI chatbots to building agentic solutions—in essence, CopilotKit lets you add a ton of useful AI capabilities to your products in minutes.
Hopefully, this guide makes it easier for you to integrate AI-powered Copilots into your existing application.
Follow CopilotKit on Twitter and say hi, and if you'd like to build something cool, join the Discord community.
Subscribe to our blog and get updates on CopilotKit in your inbox.
